Windsurf board Side Hustle 1 of many..
Brands like Flikka have awesome stainless steel inserts with M6 threads. I wanted something similar for my custom windsurf board and this was the approach:
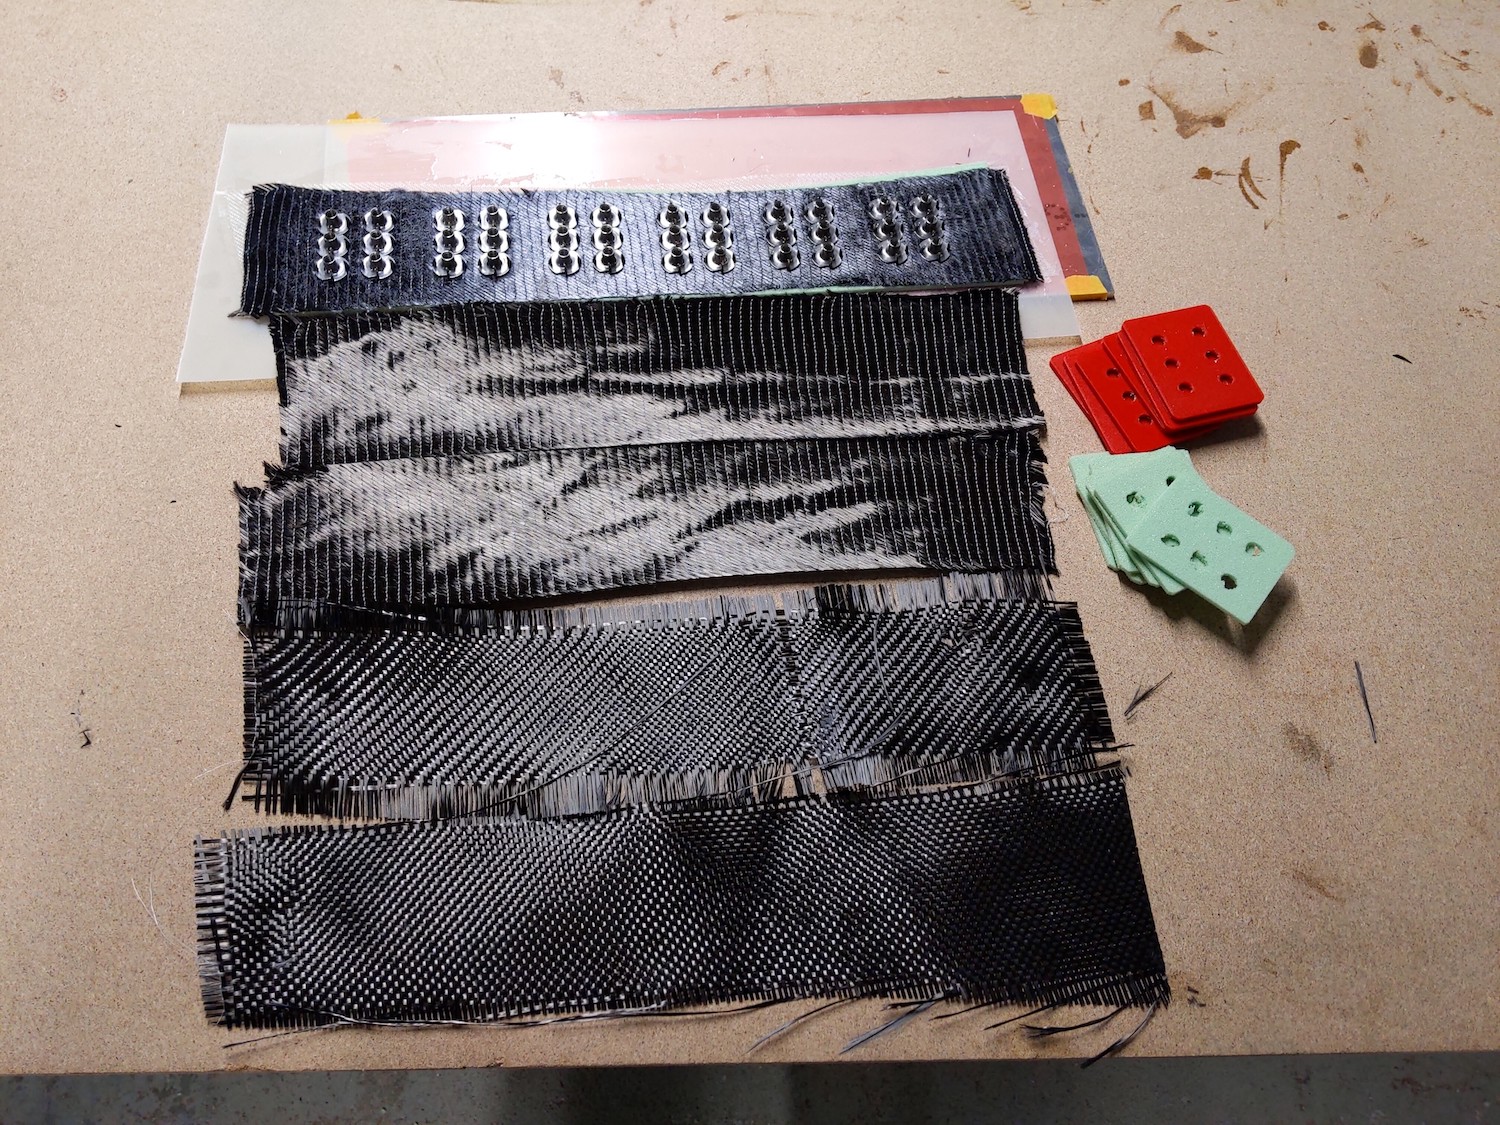
The basis were stainless steel drive-in nuts that can be bought in any hardware store (don't get the the nickeled ones, they'll corrode). There was another tip from Will Cyr in the Board & Hydrofoil Building group on FB to add an insulating layer of glass between the stainless steel and the carbon to prevent corrosion even in salt water use.
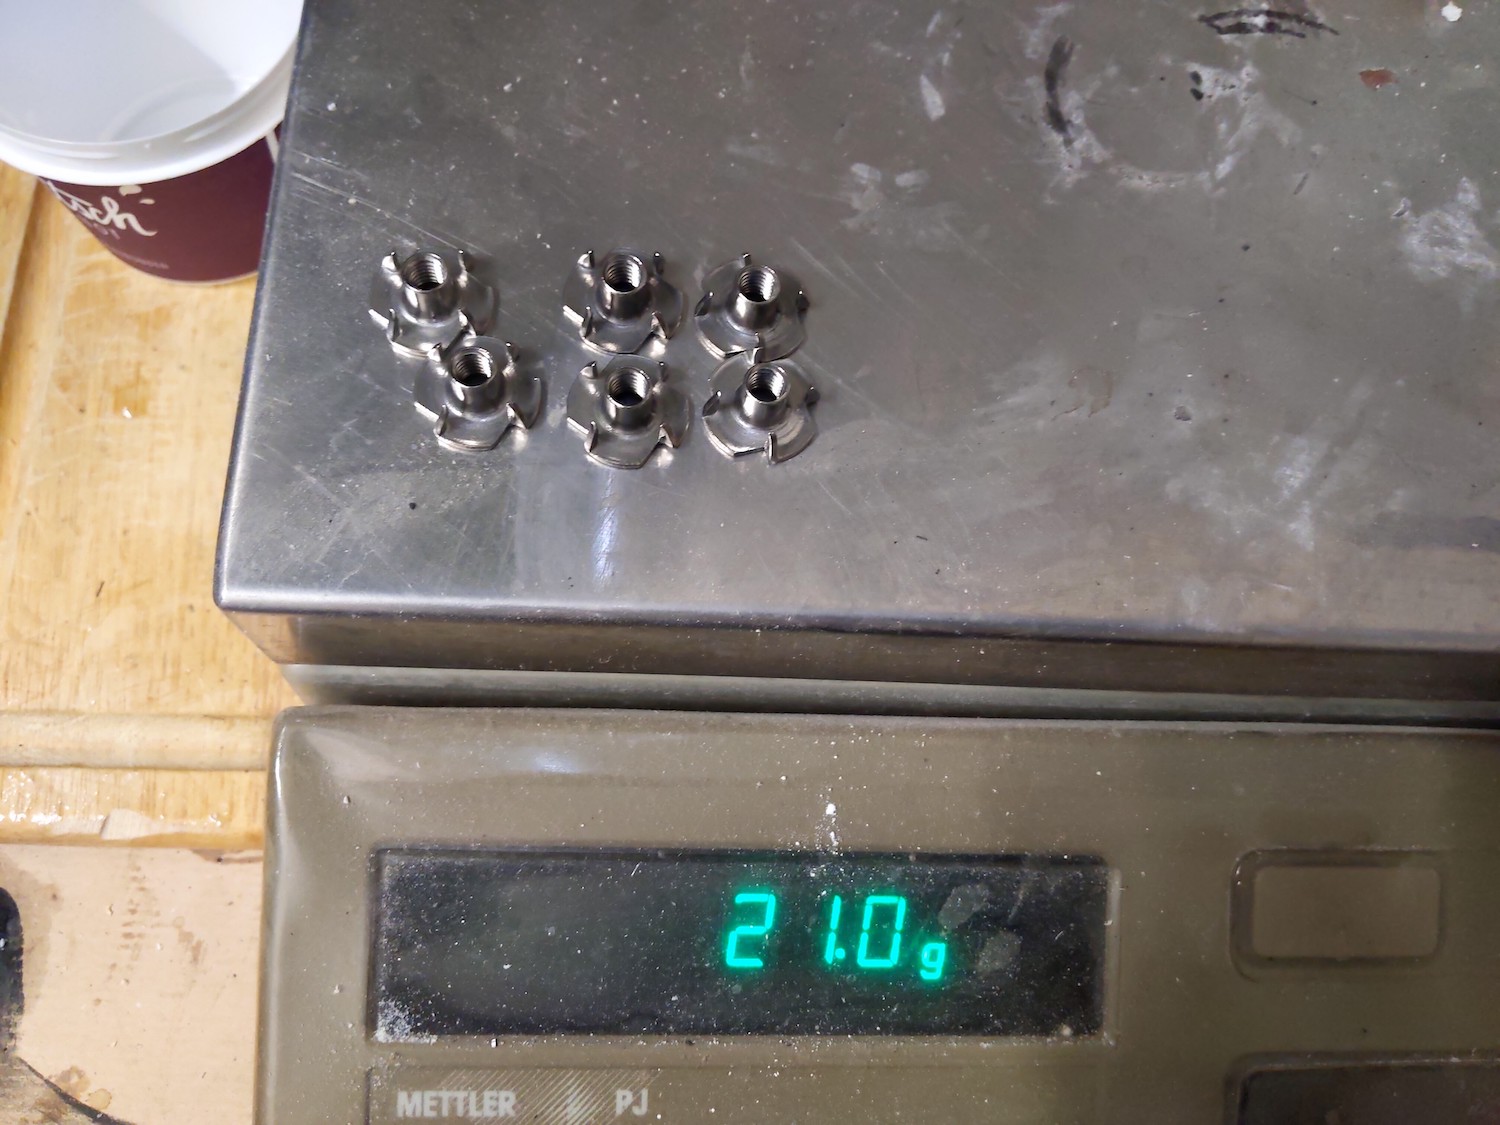
Six of these nuts weight 21g and there will be a total of 36, so 126g - not so bad! To make them usable they need to be embedded into a carbon+Airex matrix to:
- keep them from rotating e.g. when a screw is stuck
- make them leak-proof
- have them flush with the surface
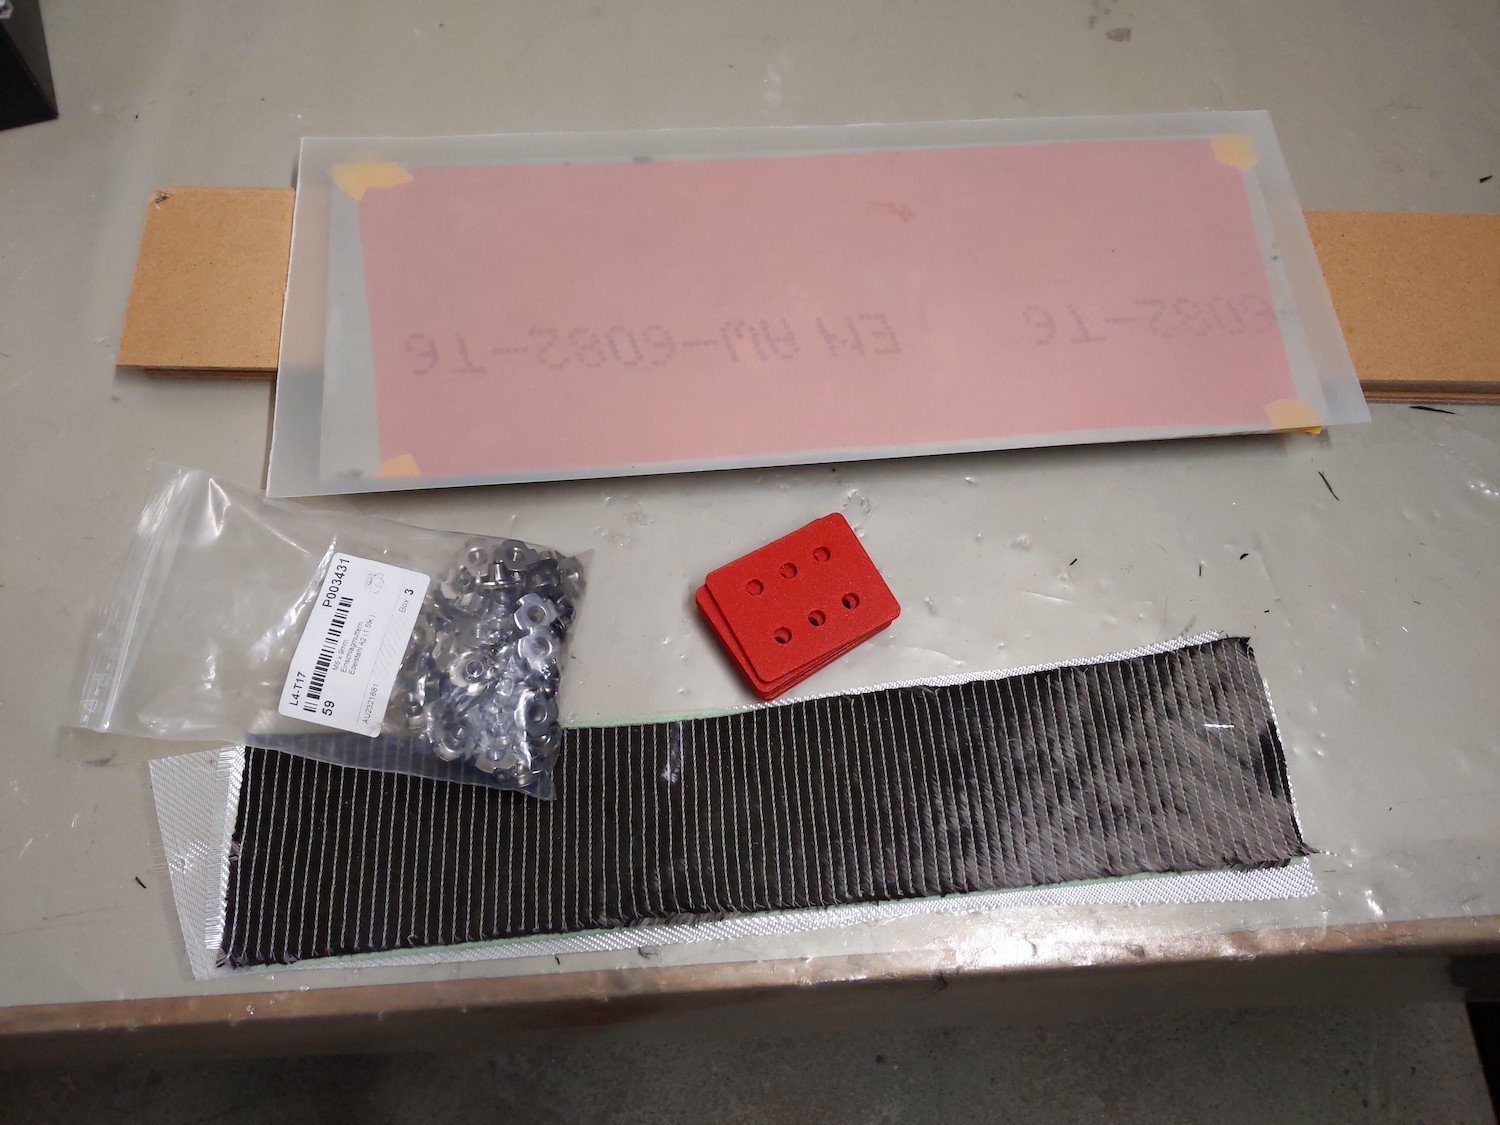
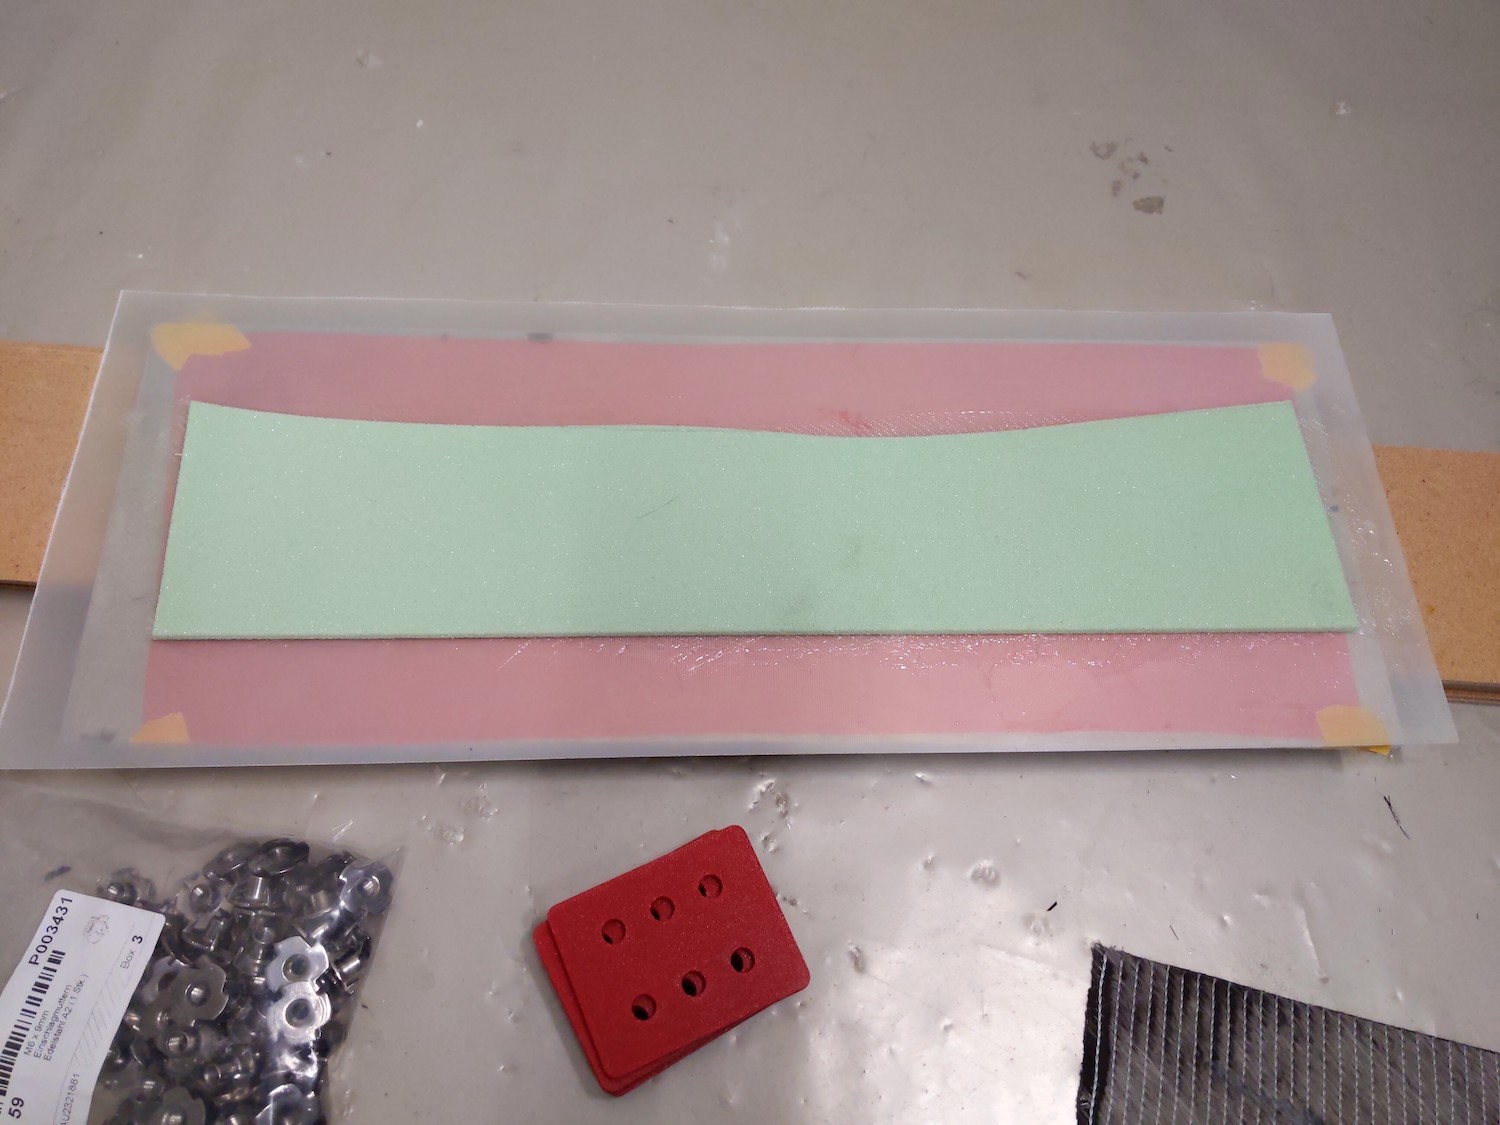
The layup is as follows:
- 3 mm Airex 80 g/m3
- 400 g/m2 bidirectional +/- 45o
- drive-in nuts
- 3 mm carbon layers (~1800 g/m2)
- 3 mm Airex 80 g/m3
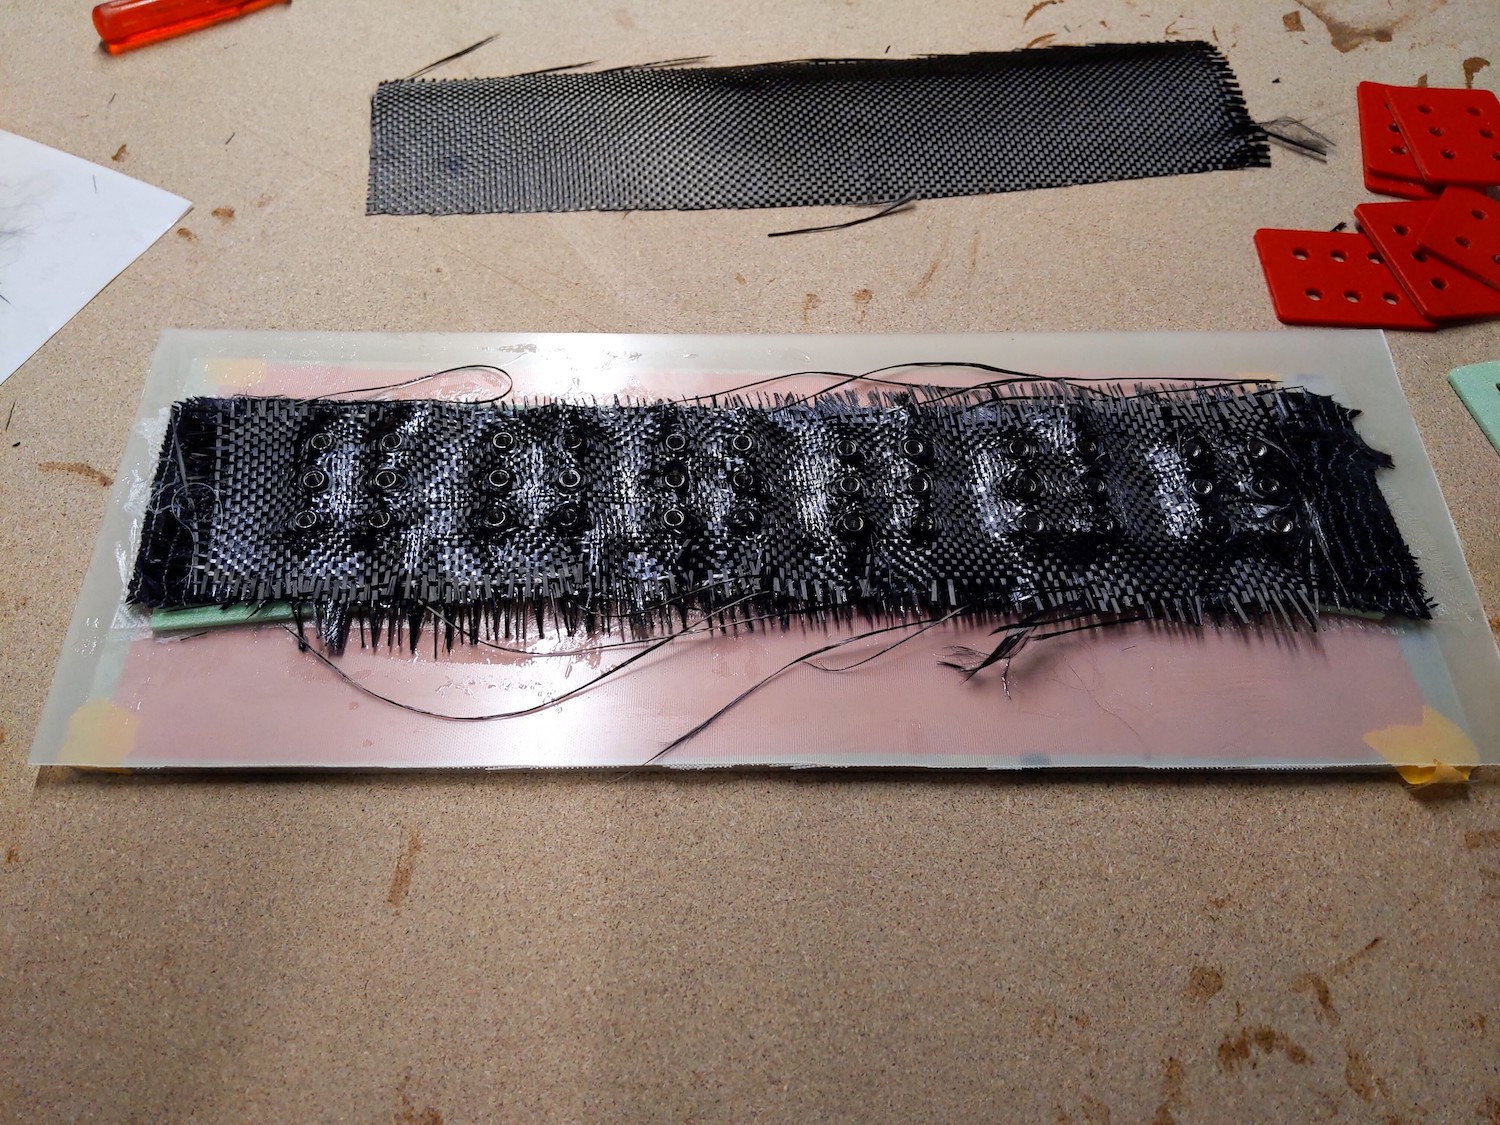
Day 1:
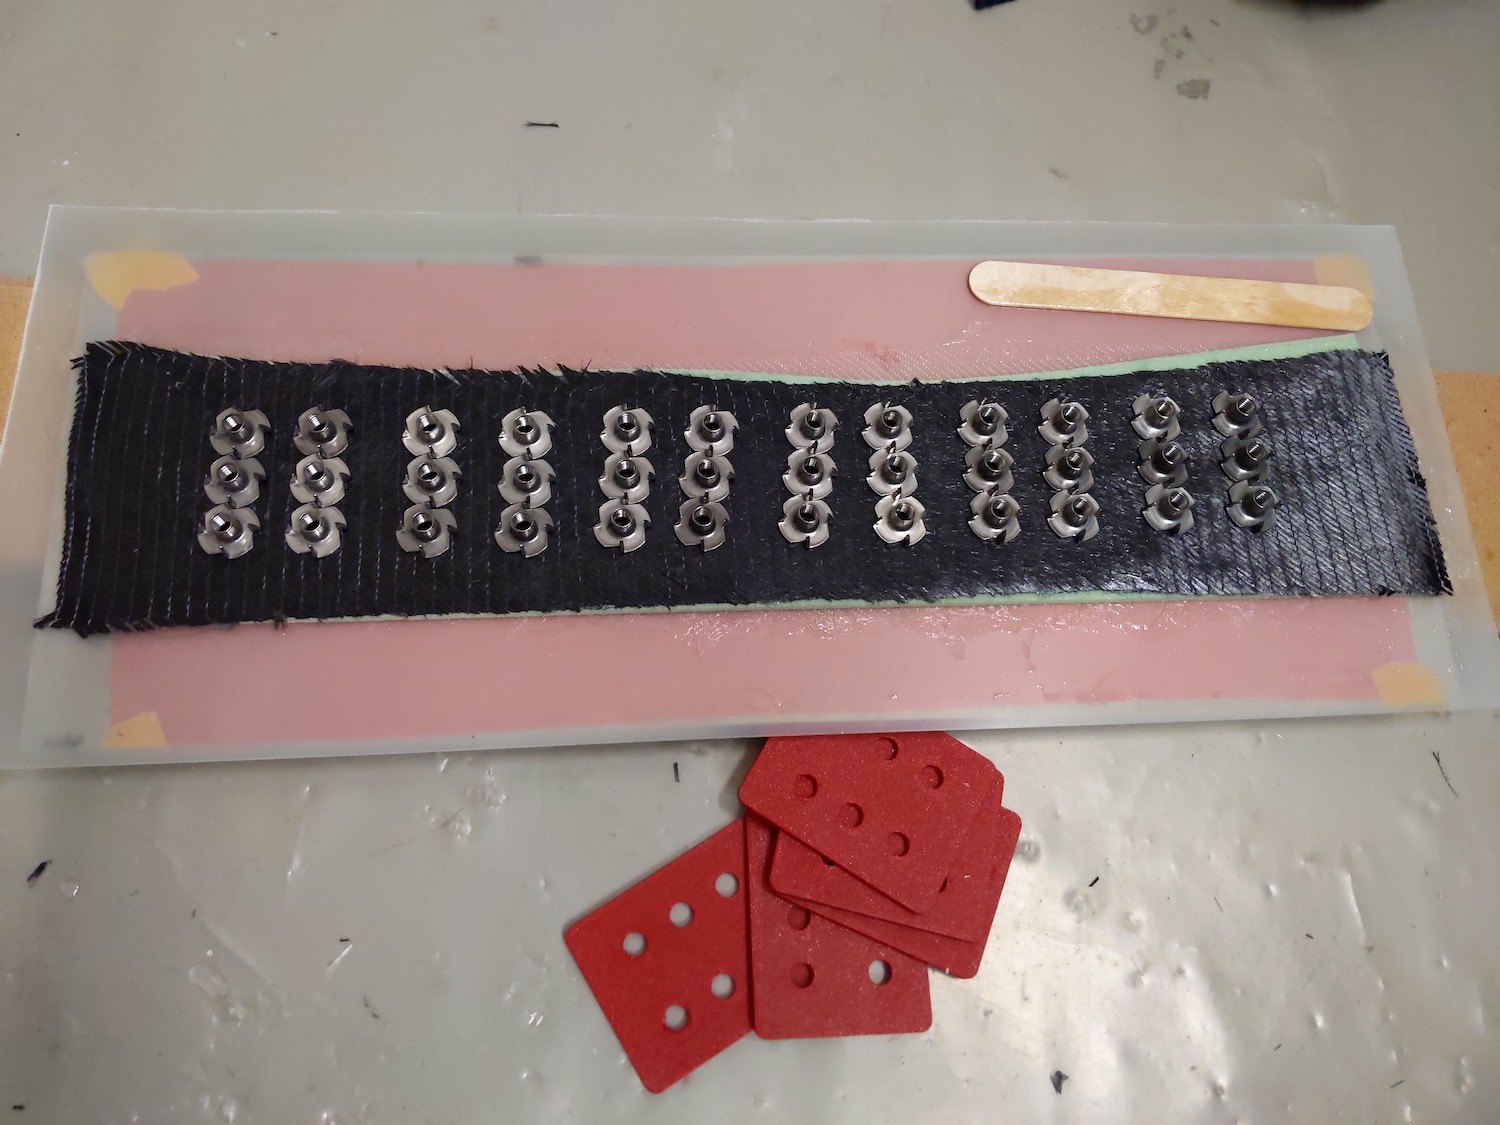
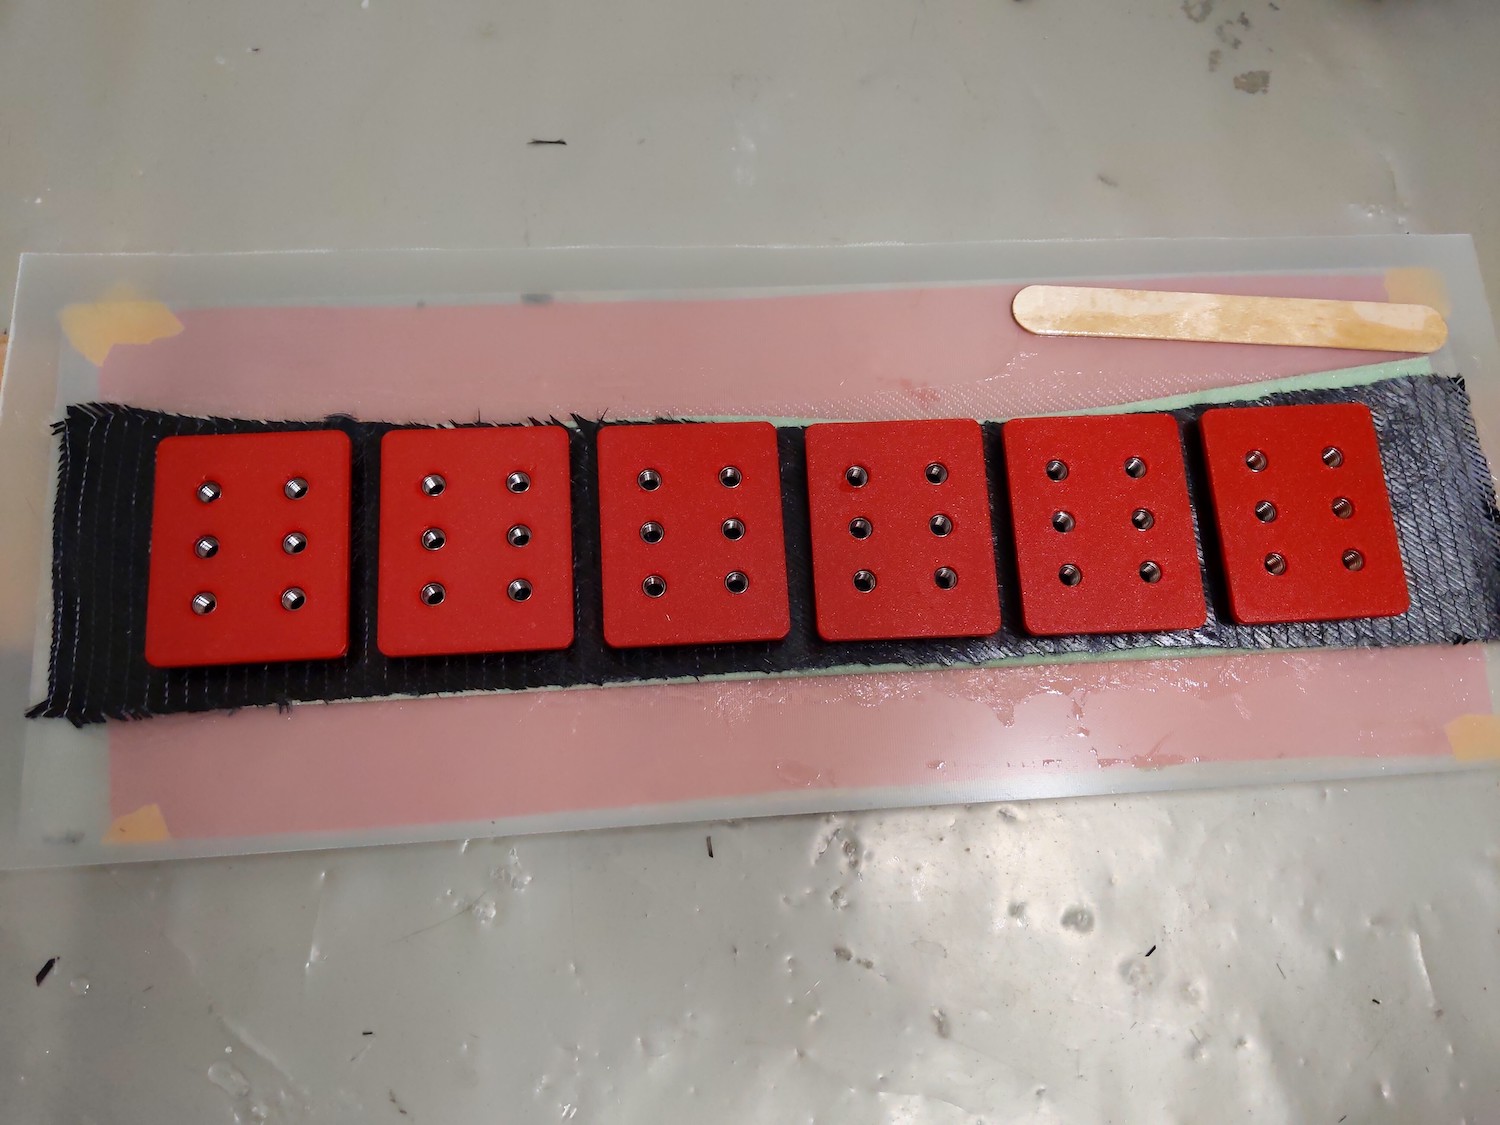
Gluing the (optinal: 80 g/m2 glass) + Airex + bidirectional carbon layer + nuts together to fix them in place. For this task 3D printed spacers come in handy! Weight down the nuts to press them into the fiber matrix a bit.
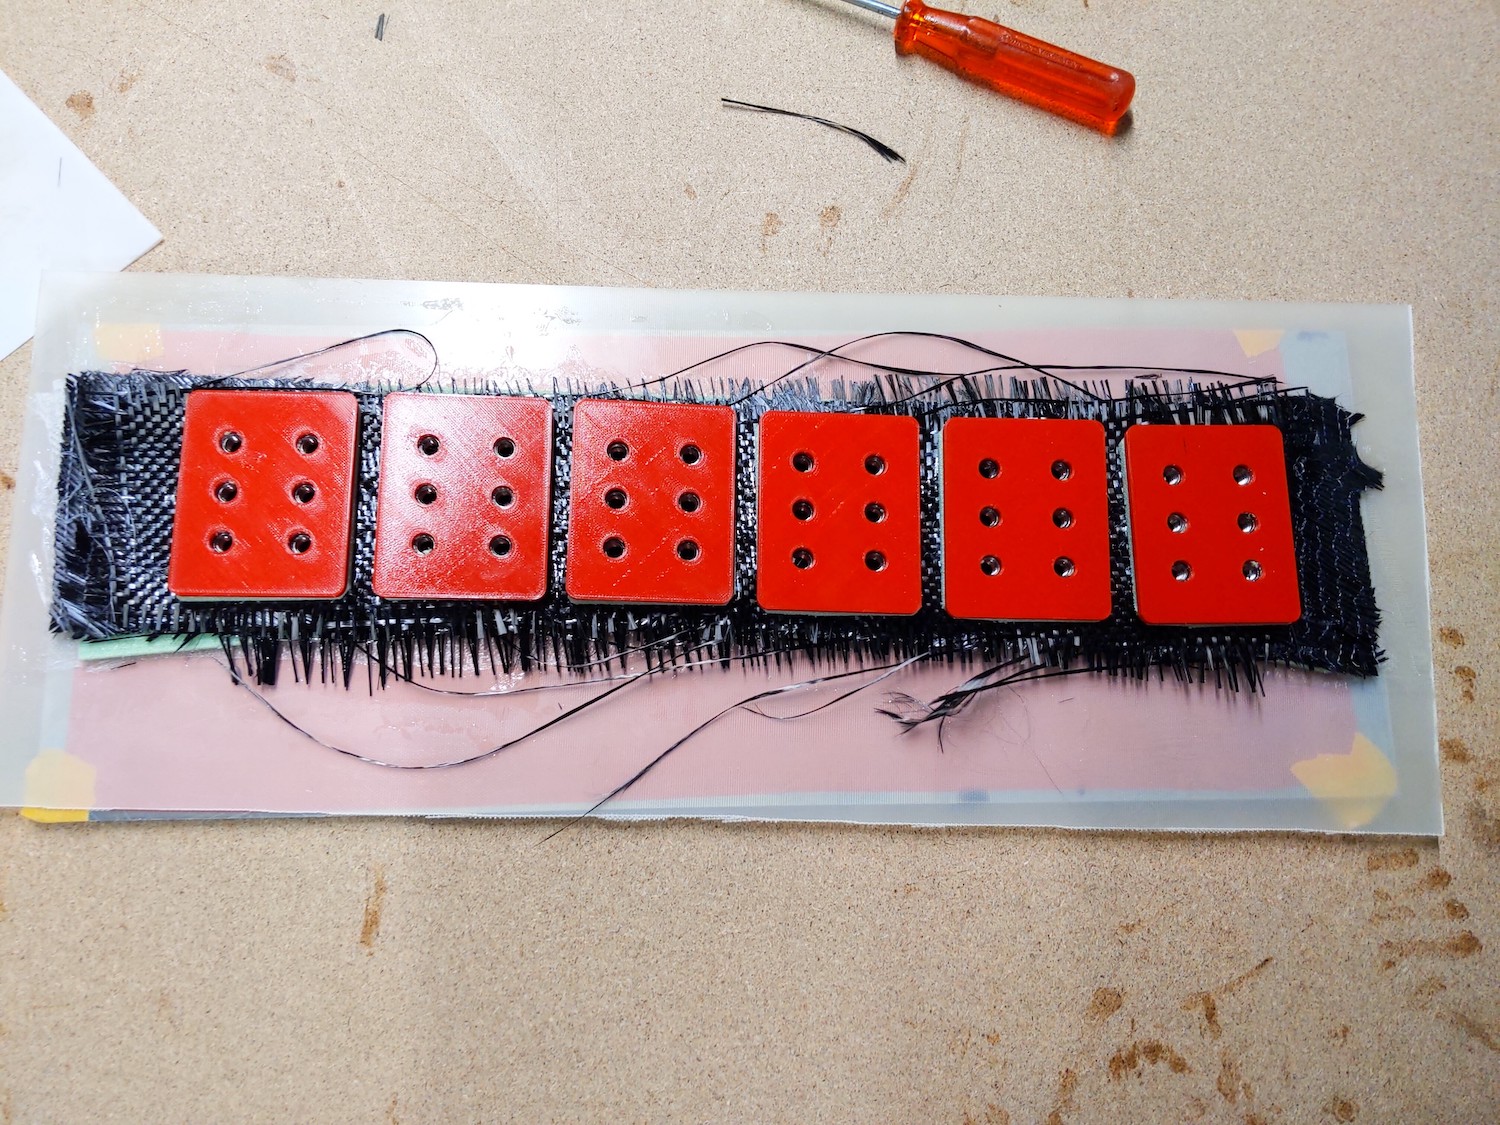
Day 2:
After the epoxy has cured the nuts are already solid in place which helps with the next step.
And that is adding more carbon layers followed by pre-cut Airex pieces:
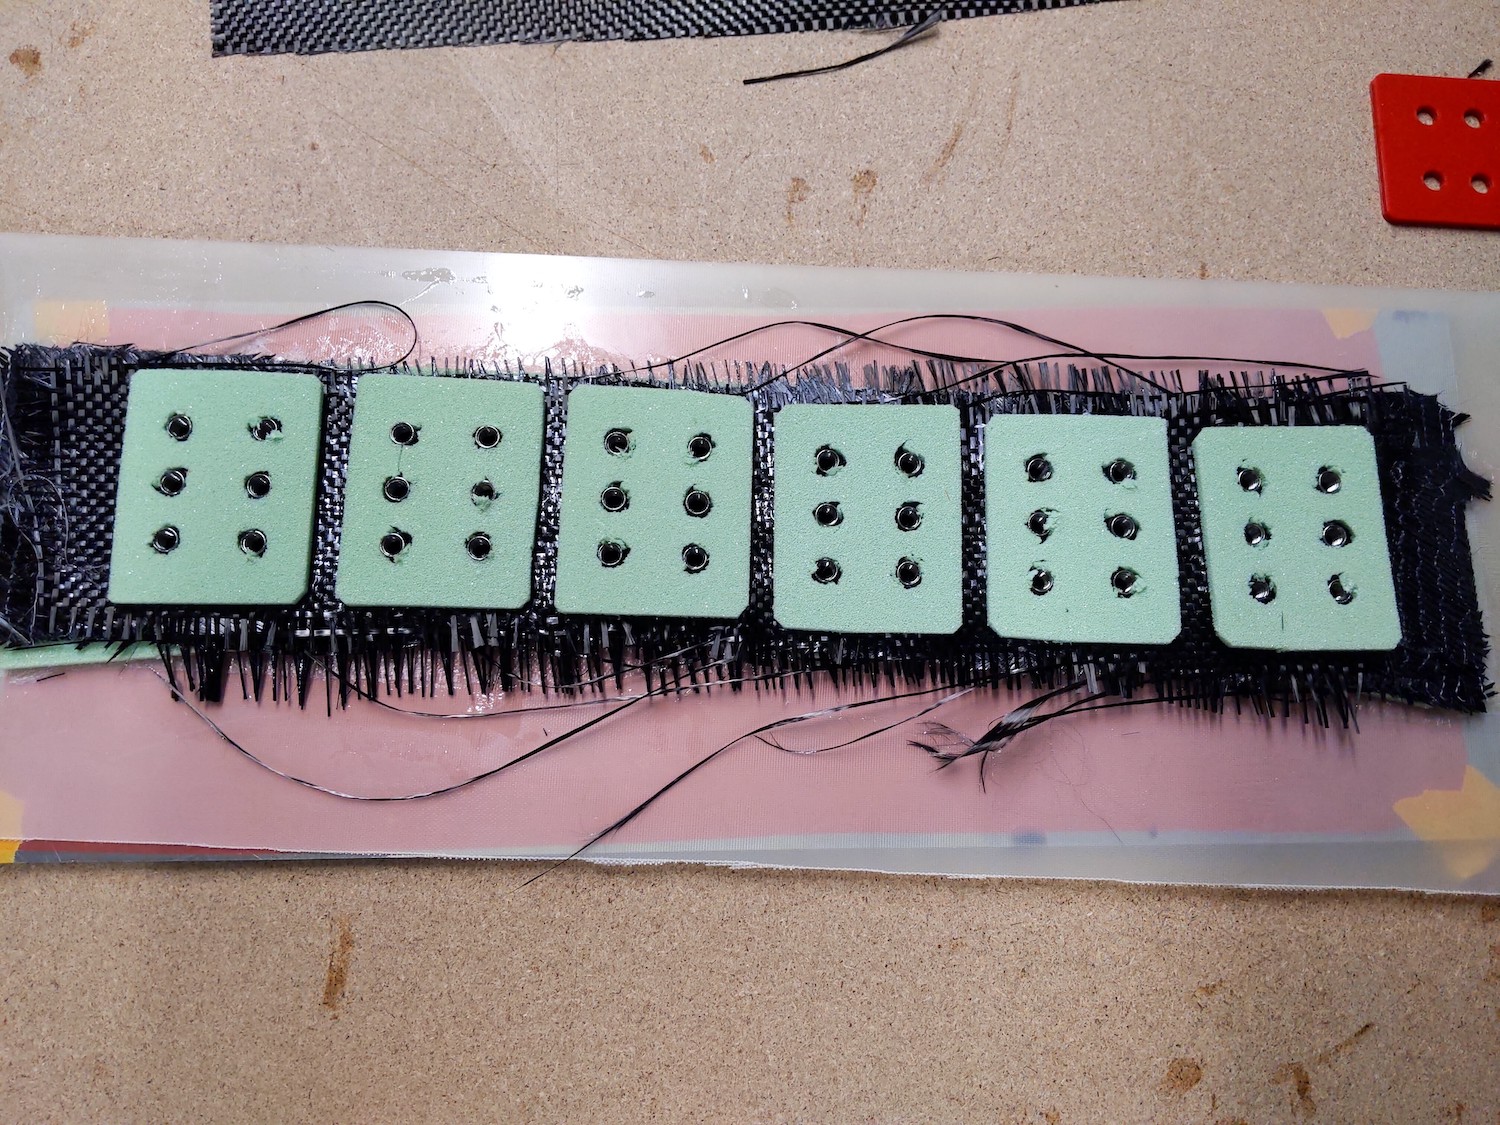
After the Airex the spacers (apply some mold release) are added onto the nuts again and the whole thing is clamped together to make all inserts equal thickness.
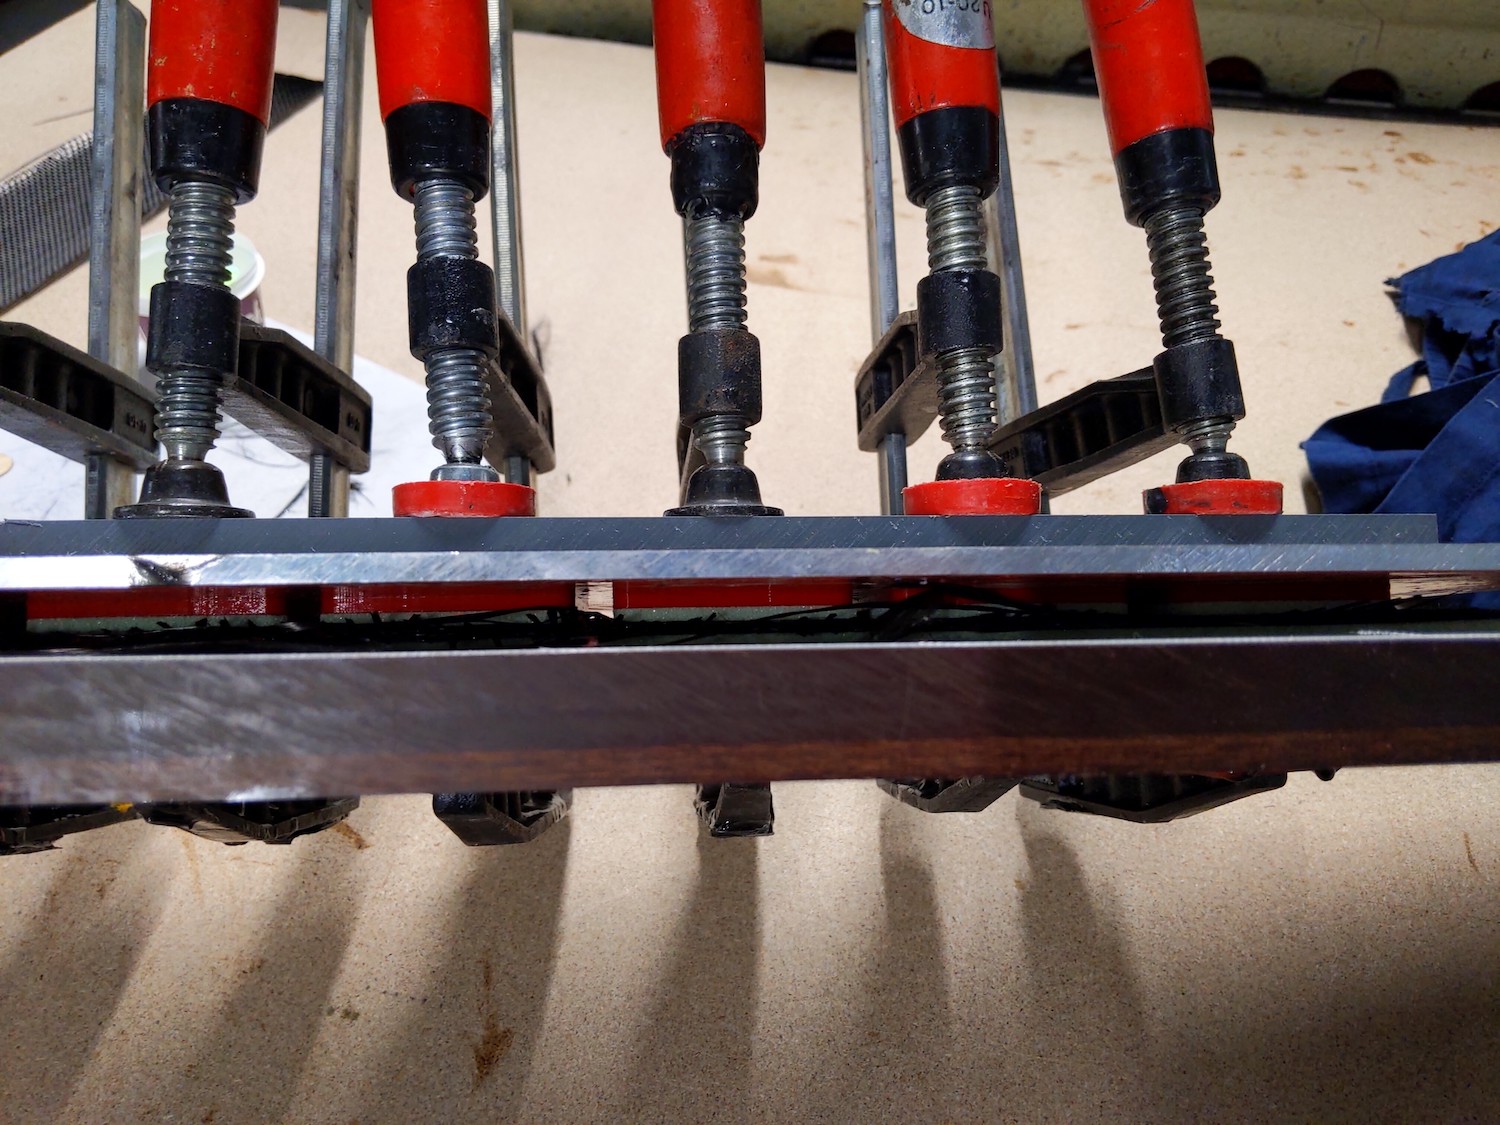
Day 3:
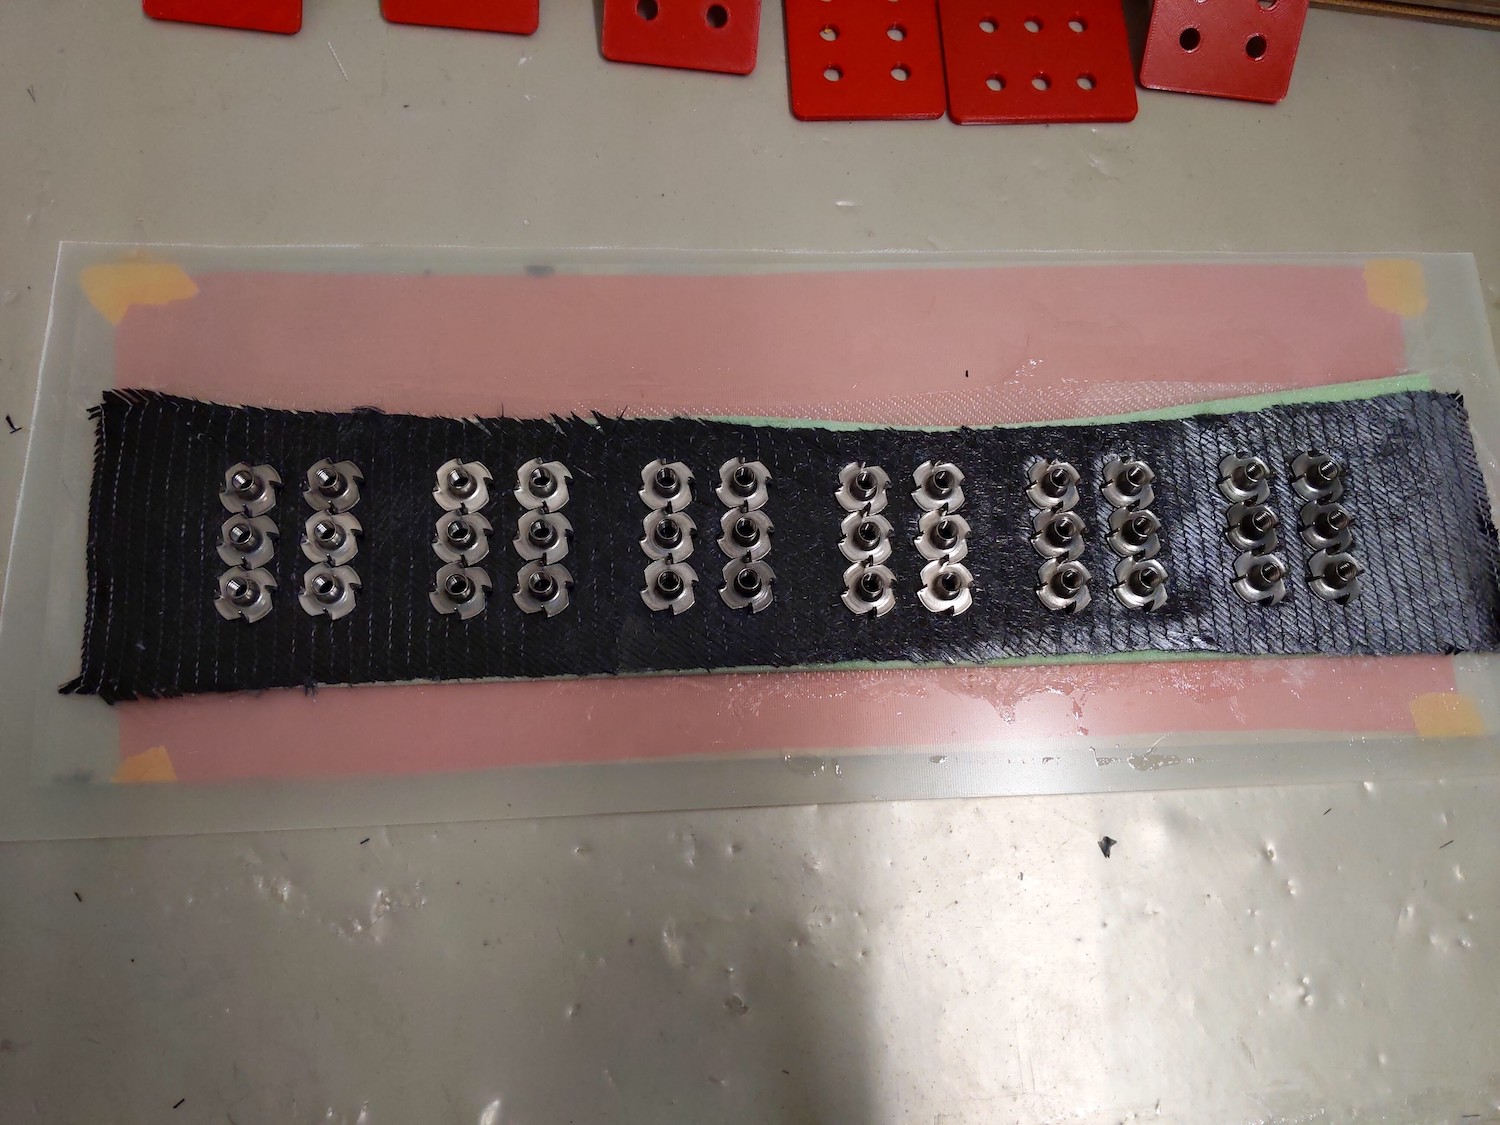
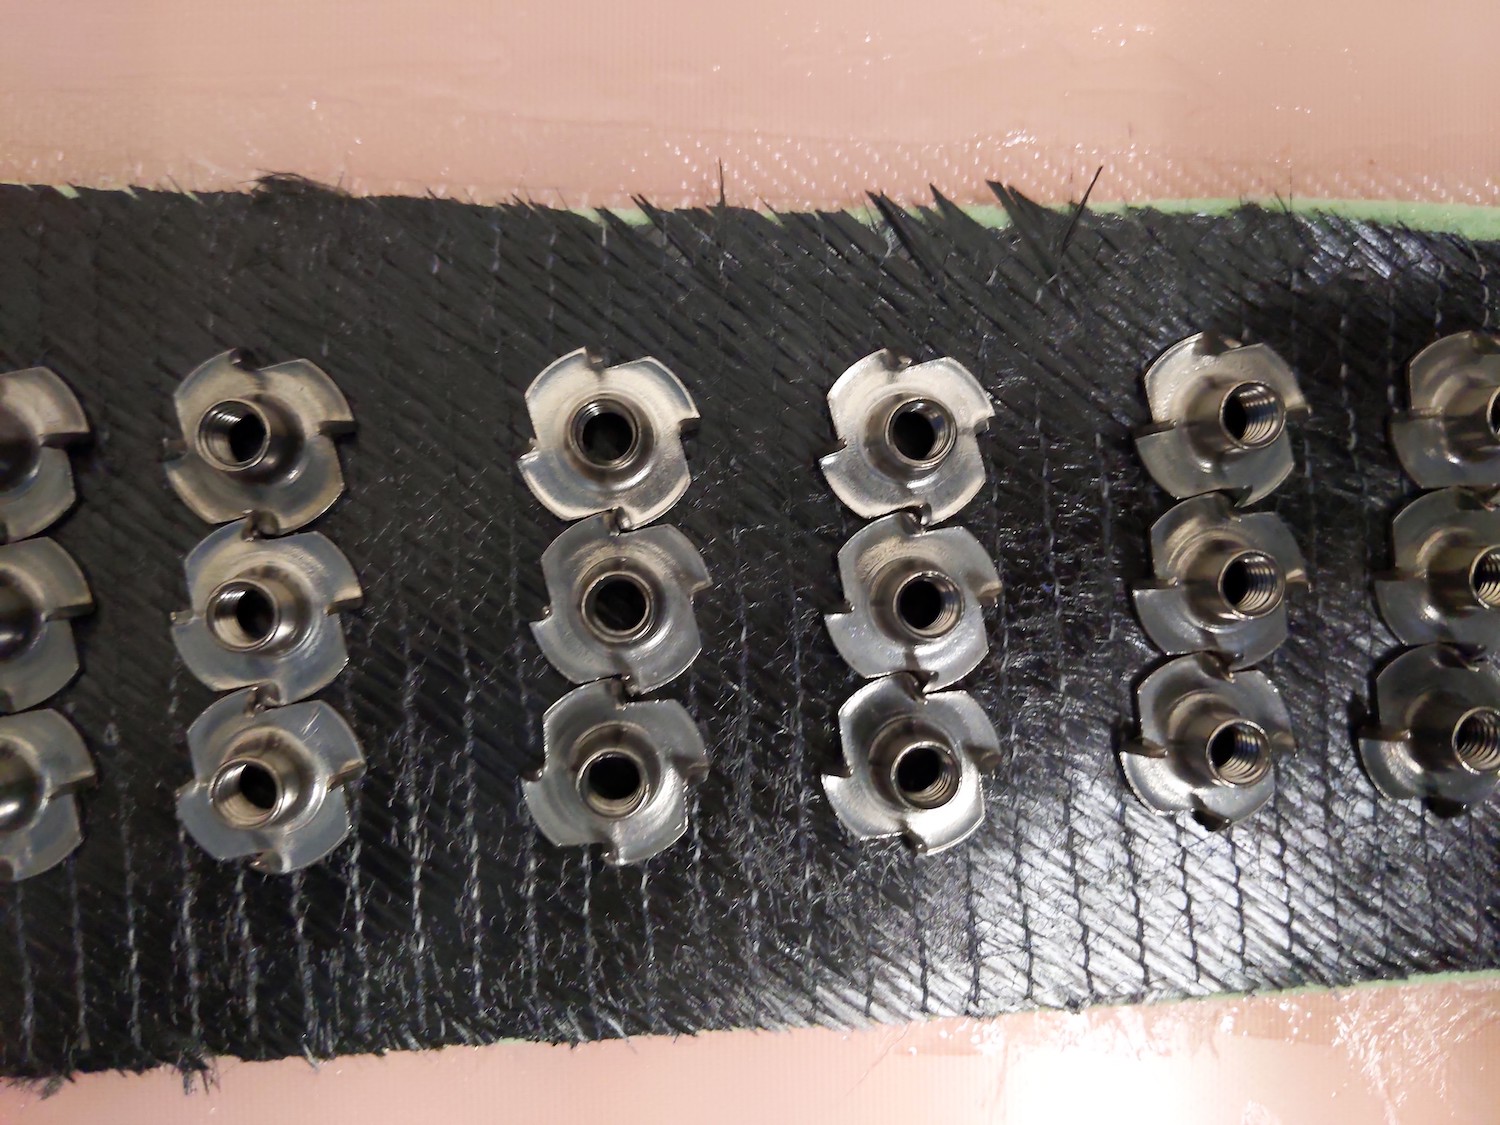
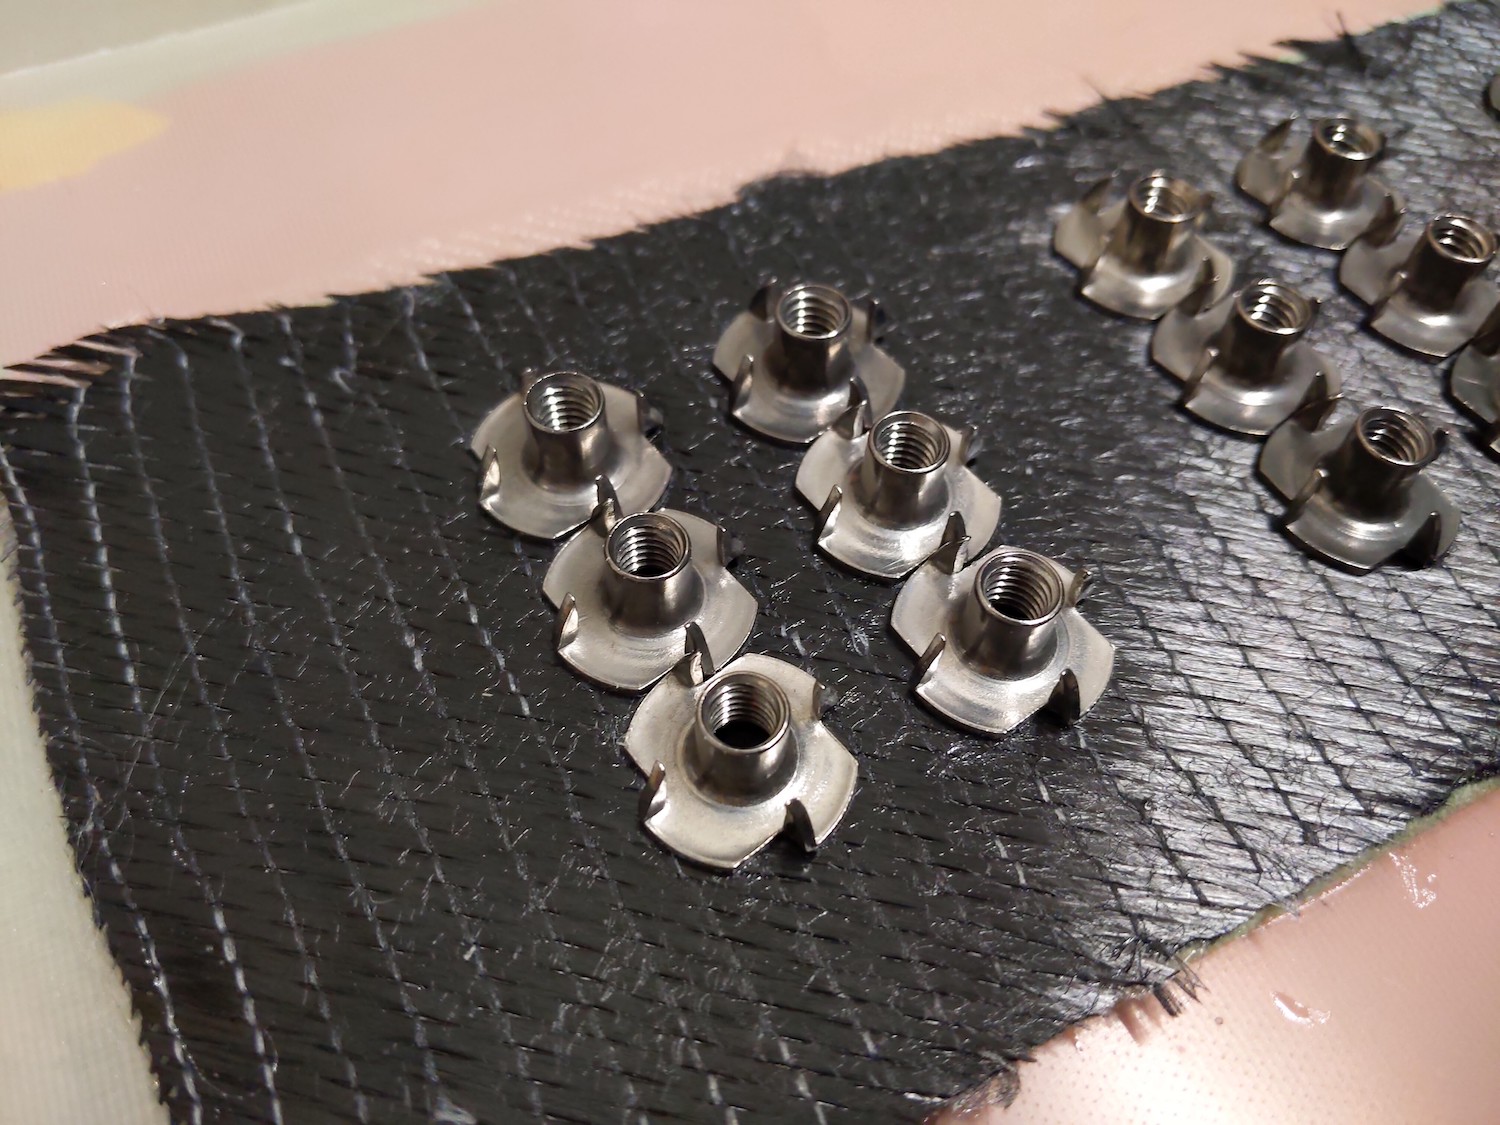
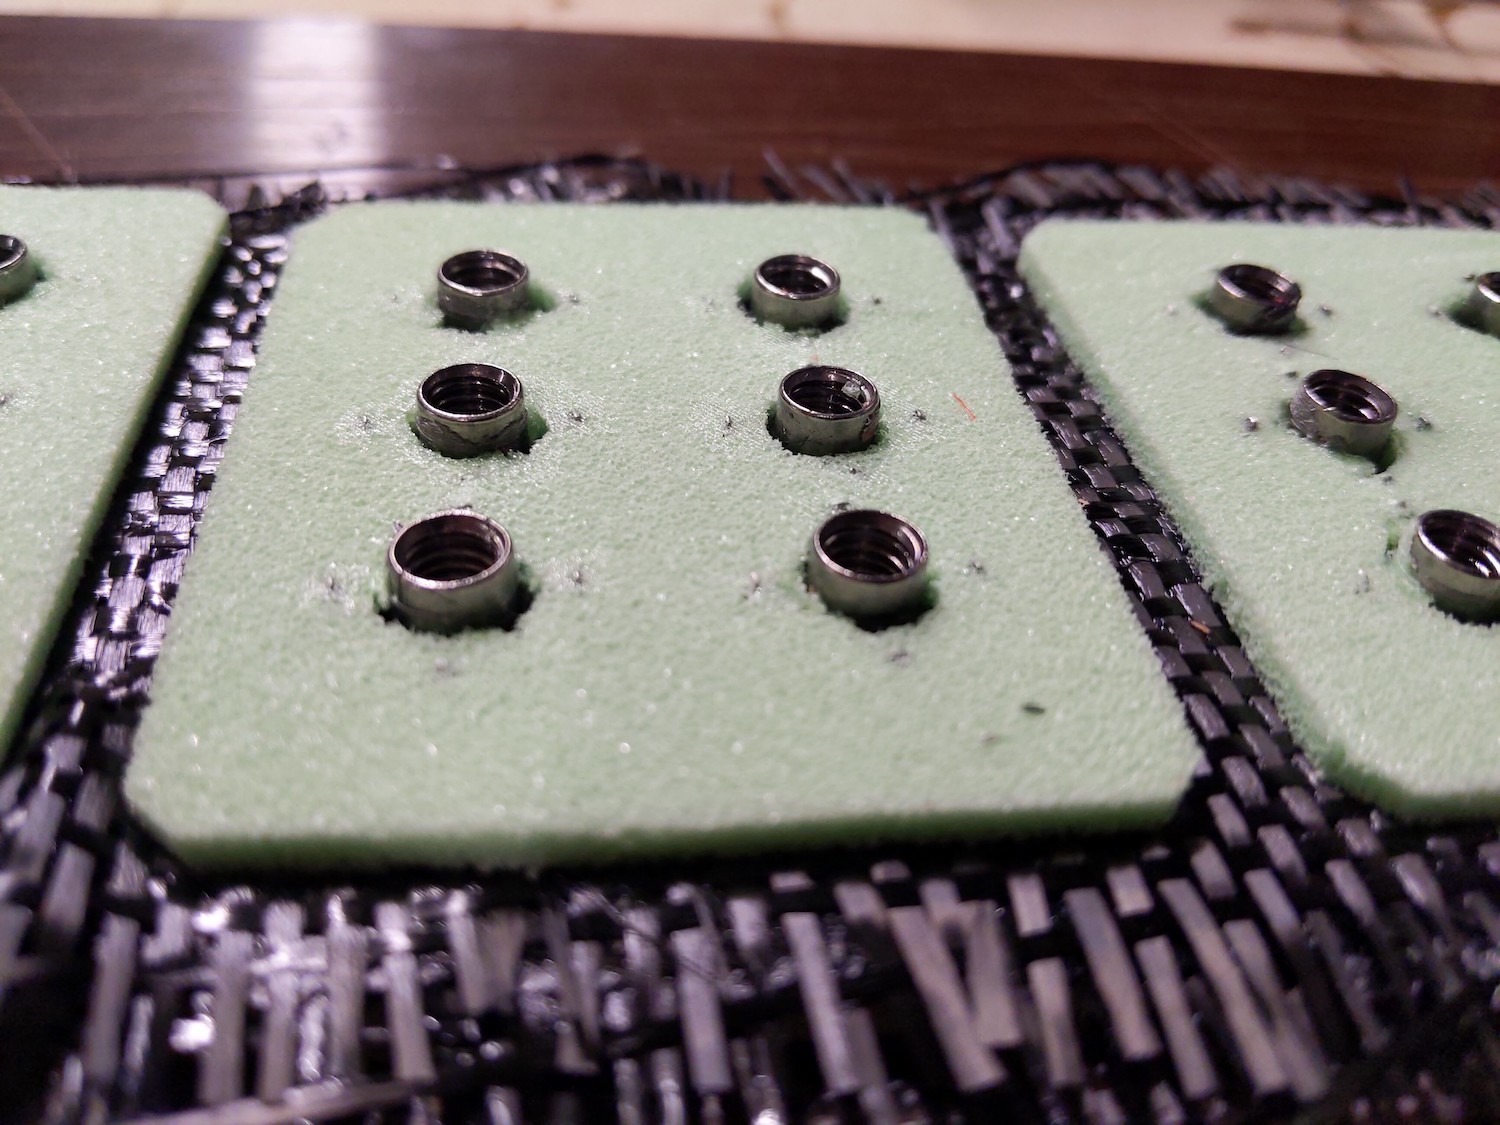
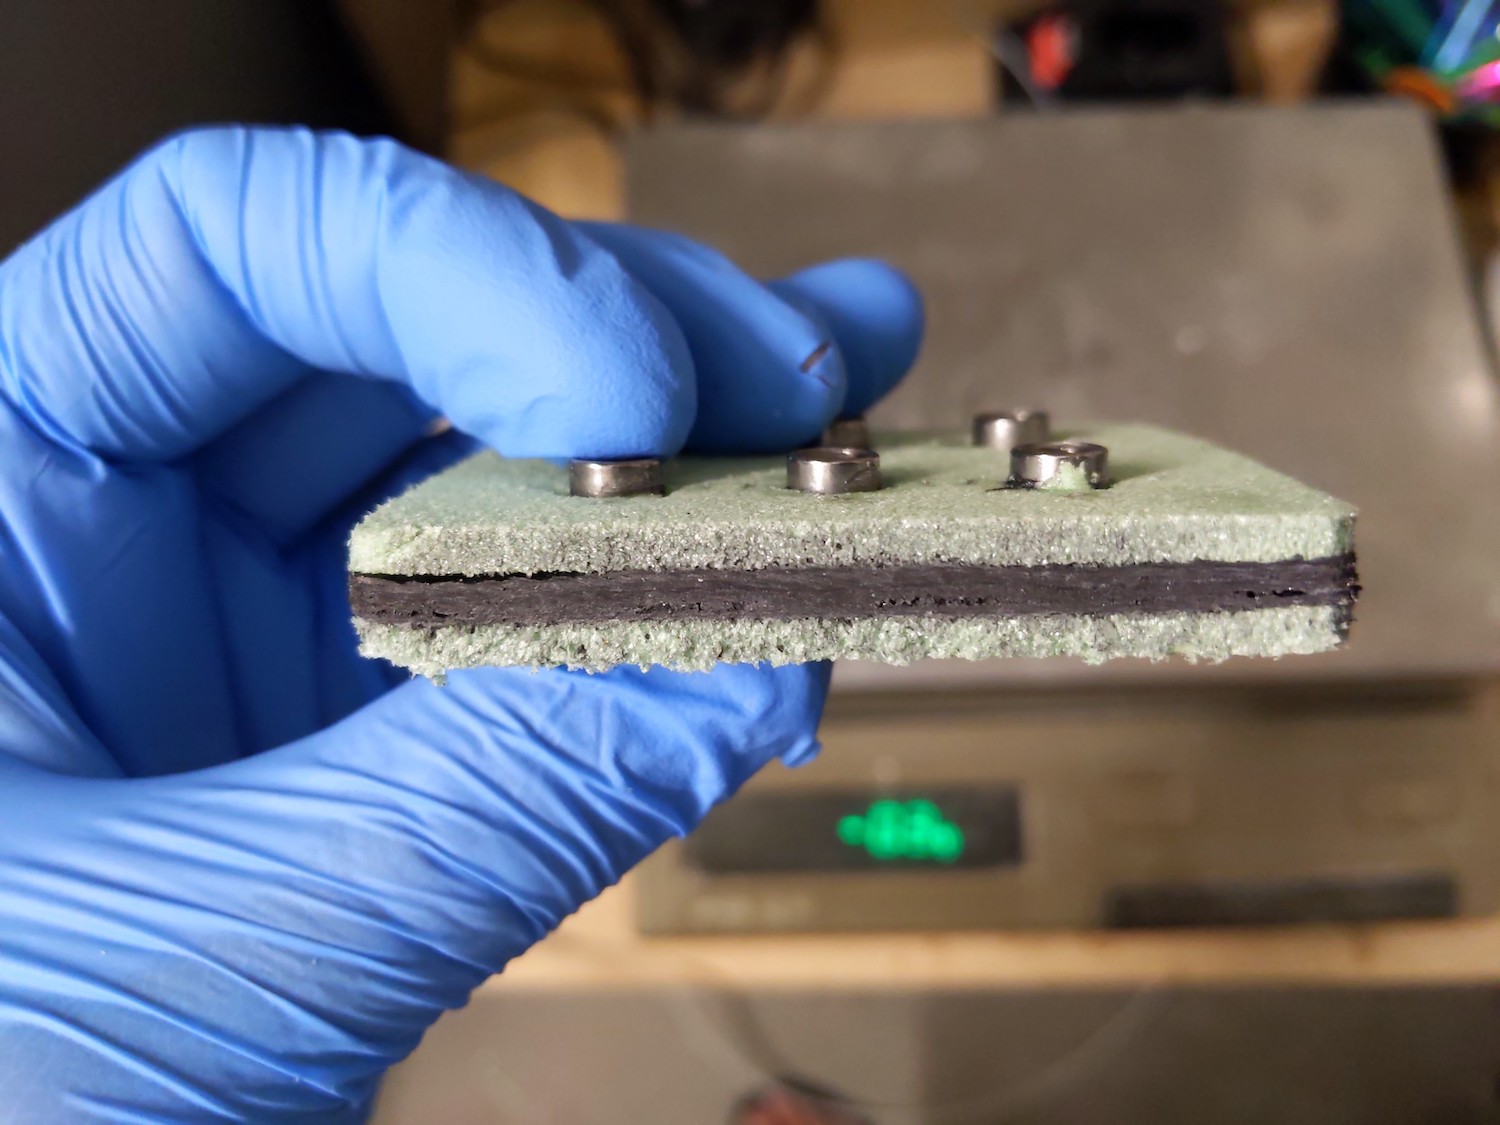
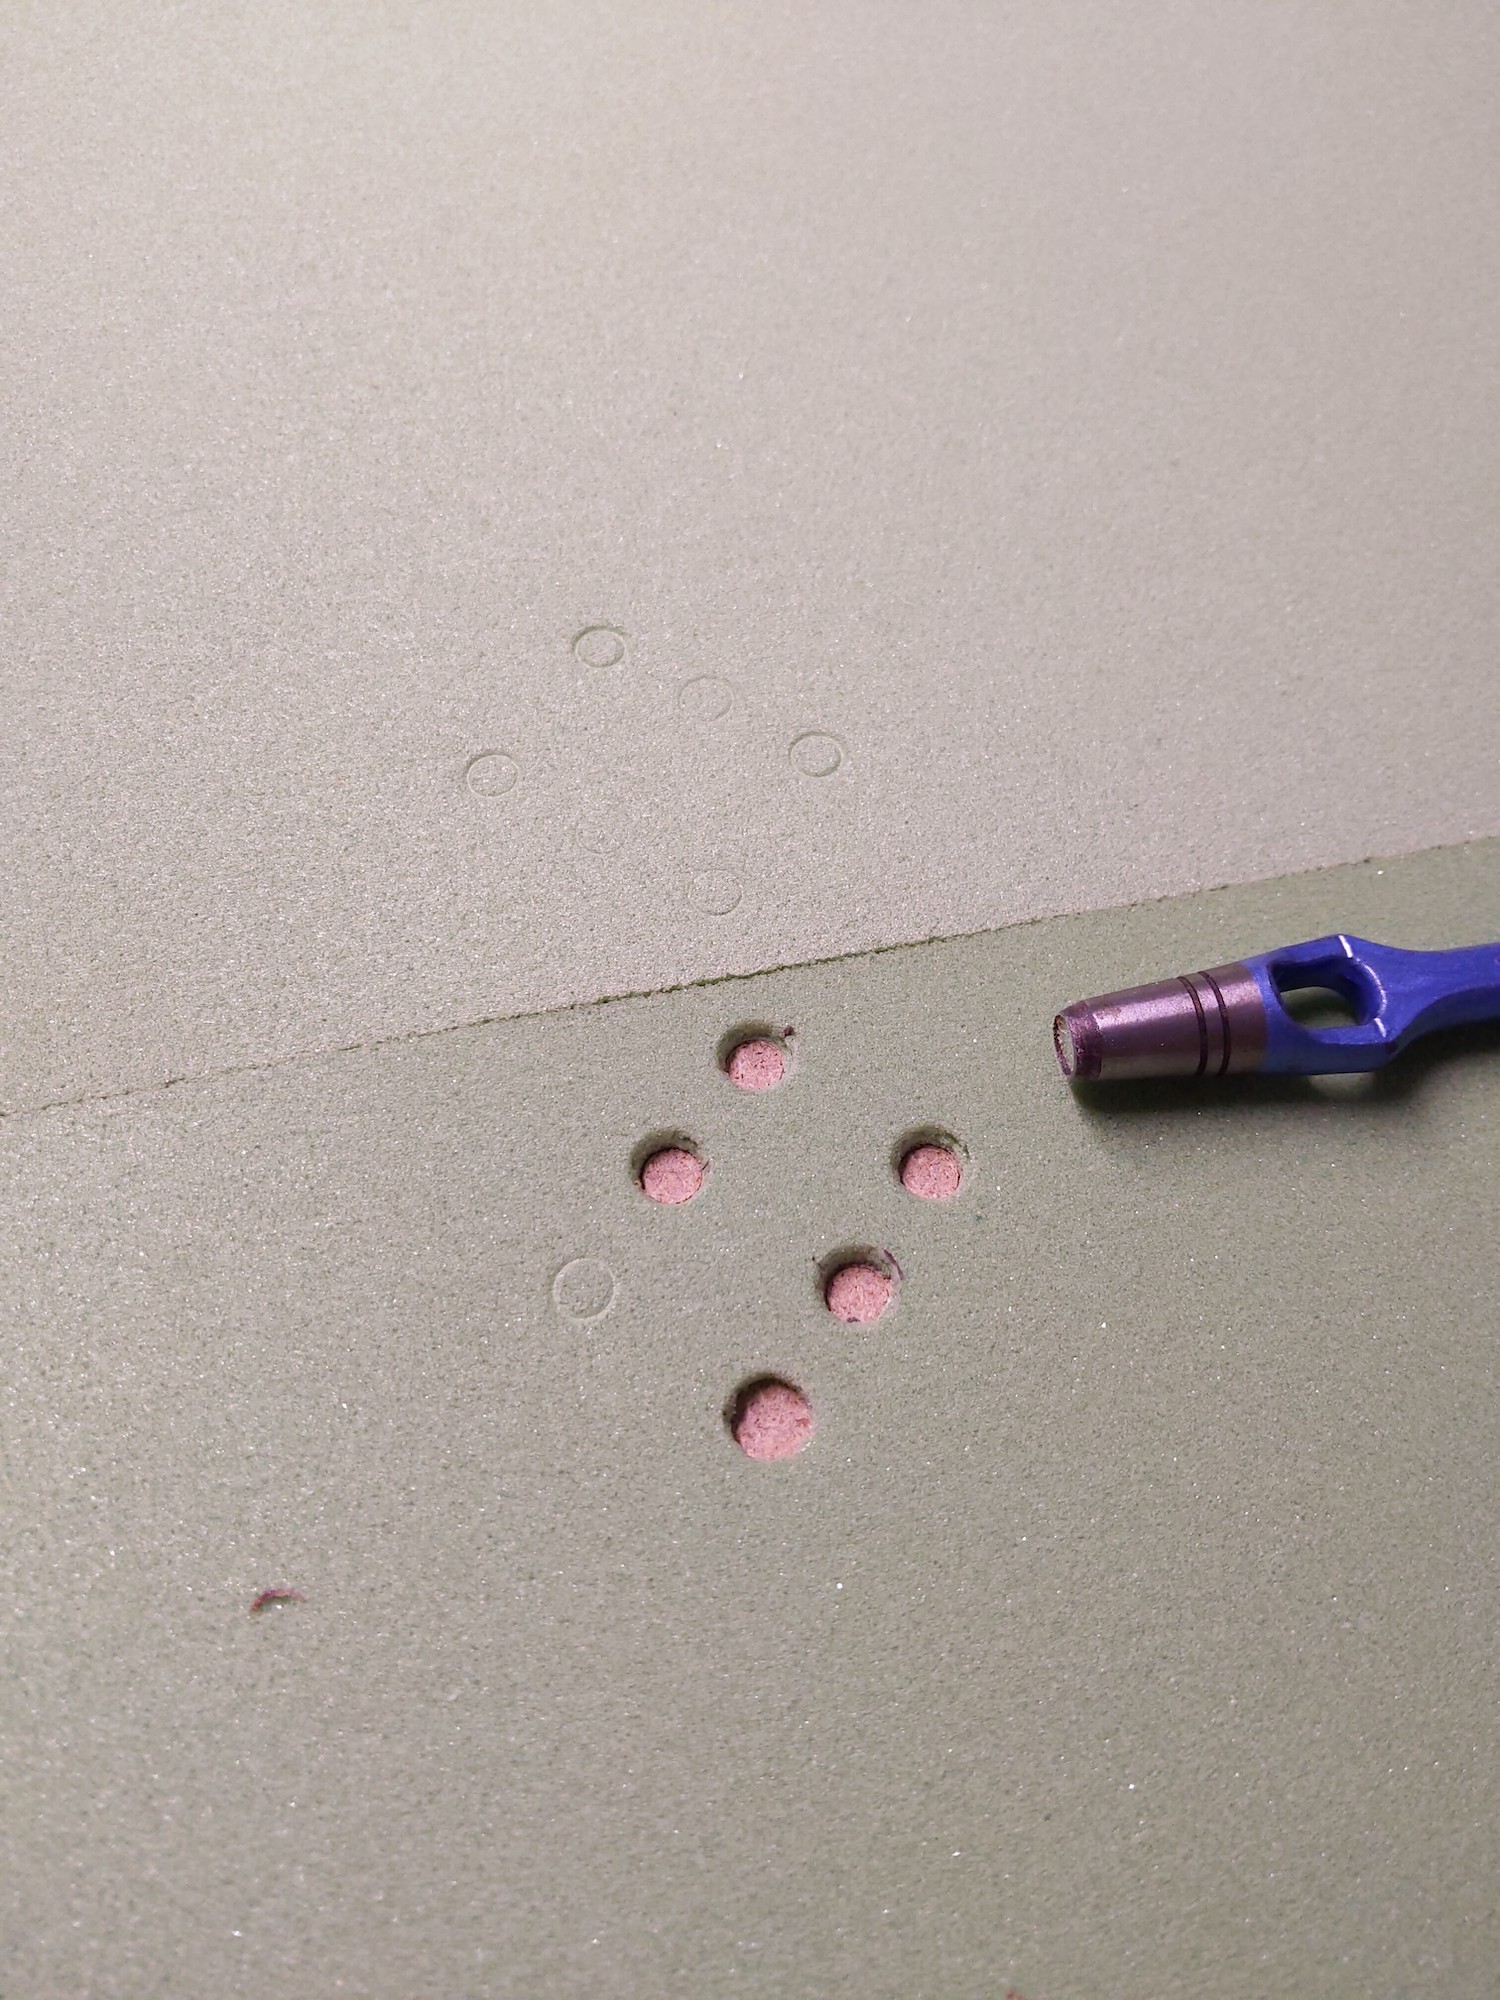
After curing it looks like this
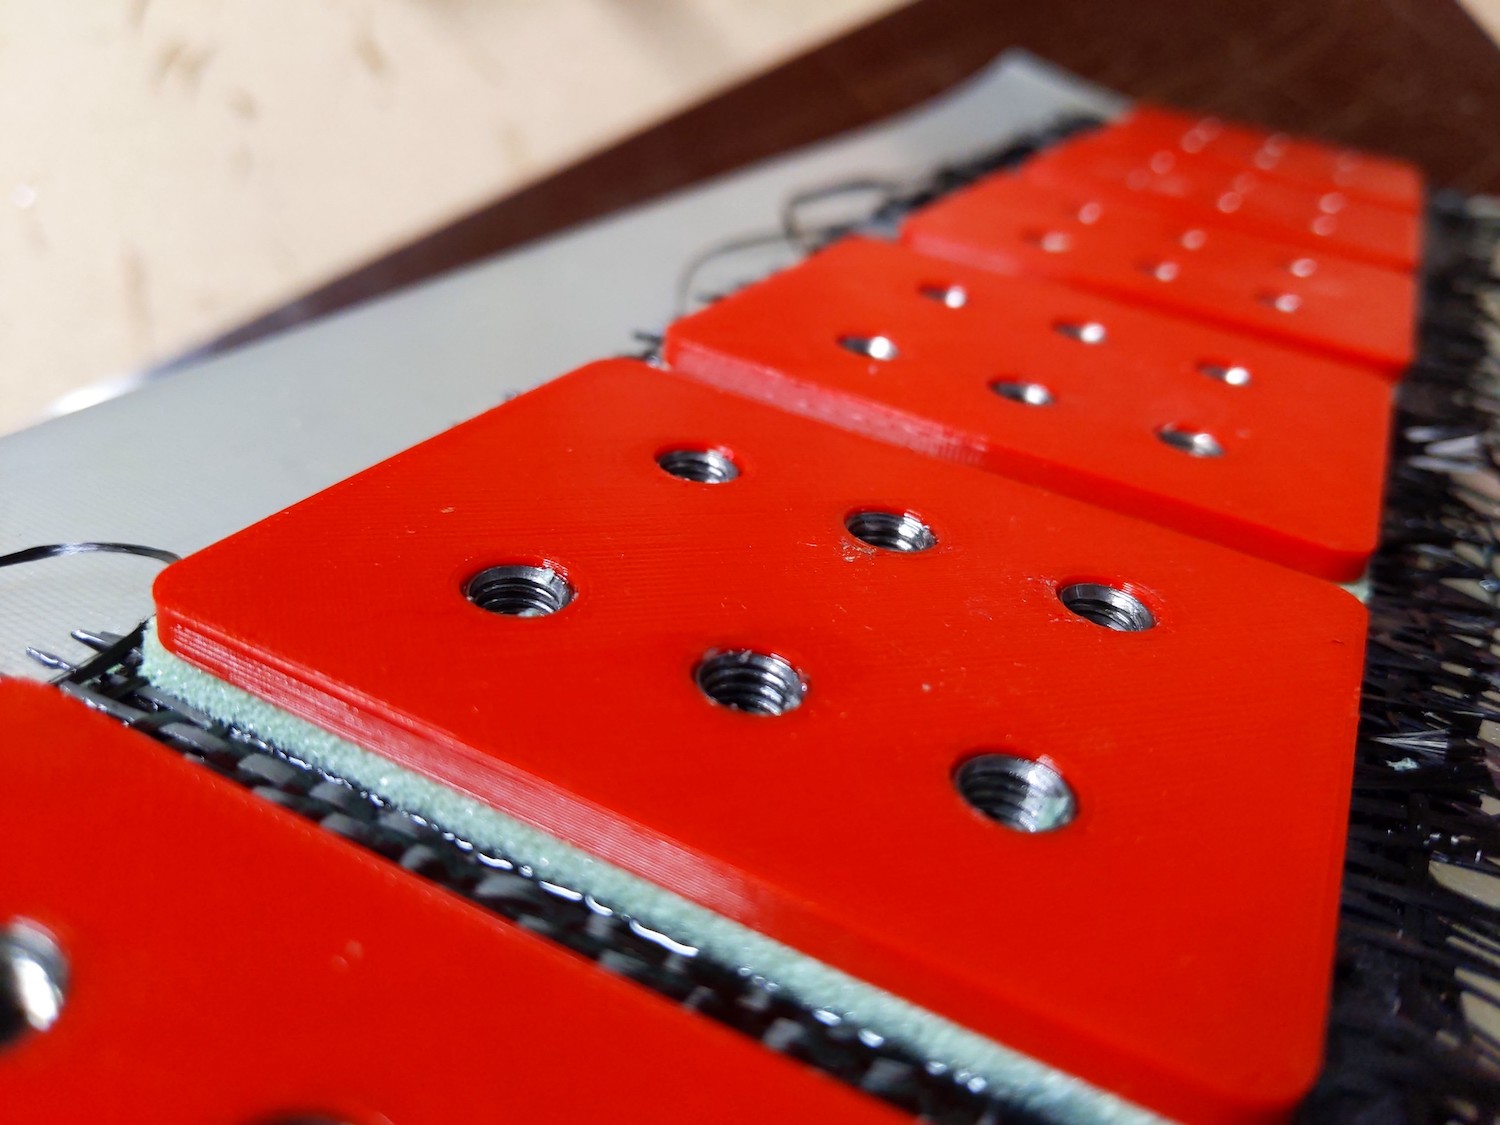
And after the spacers are removed like this
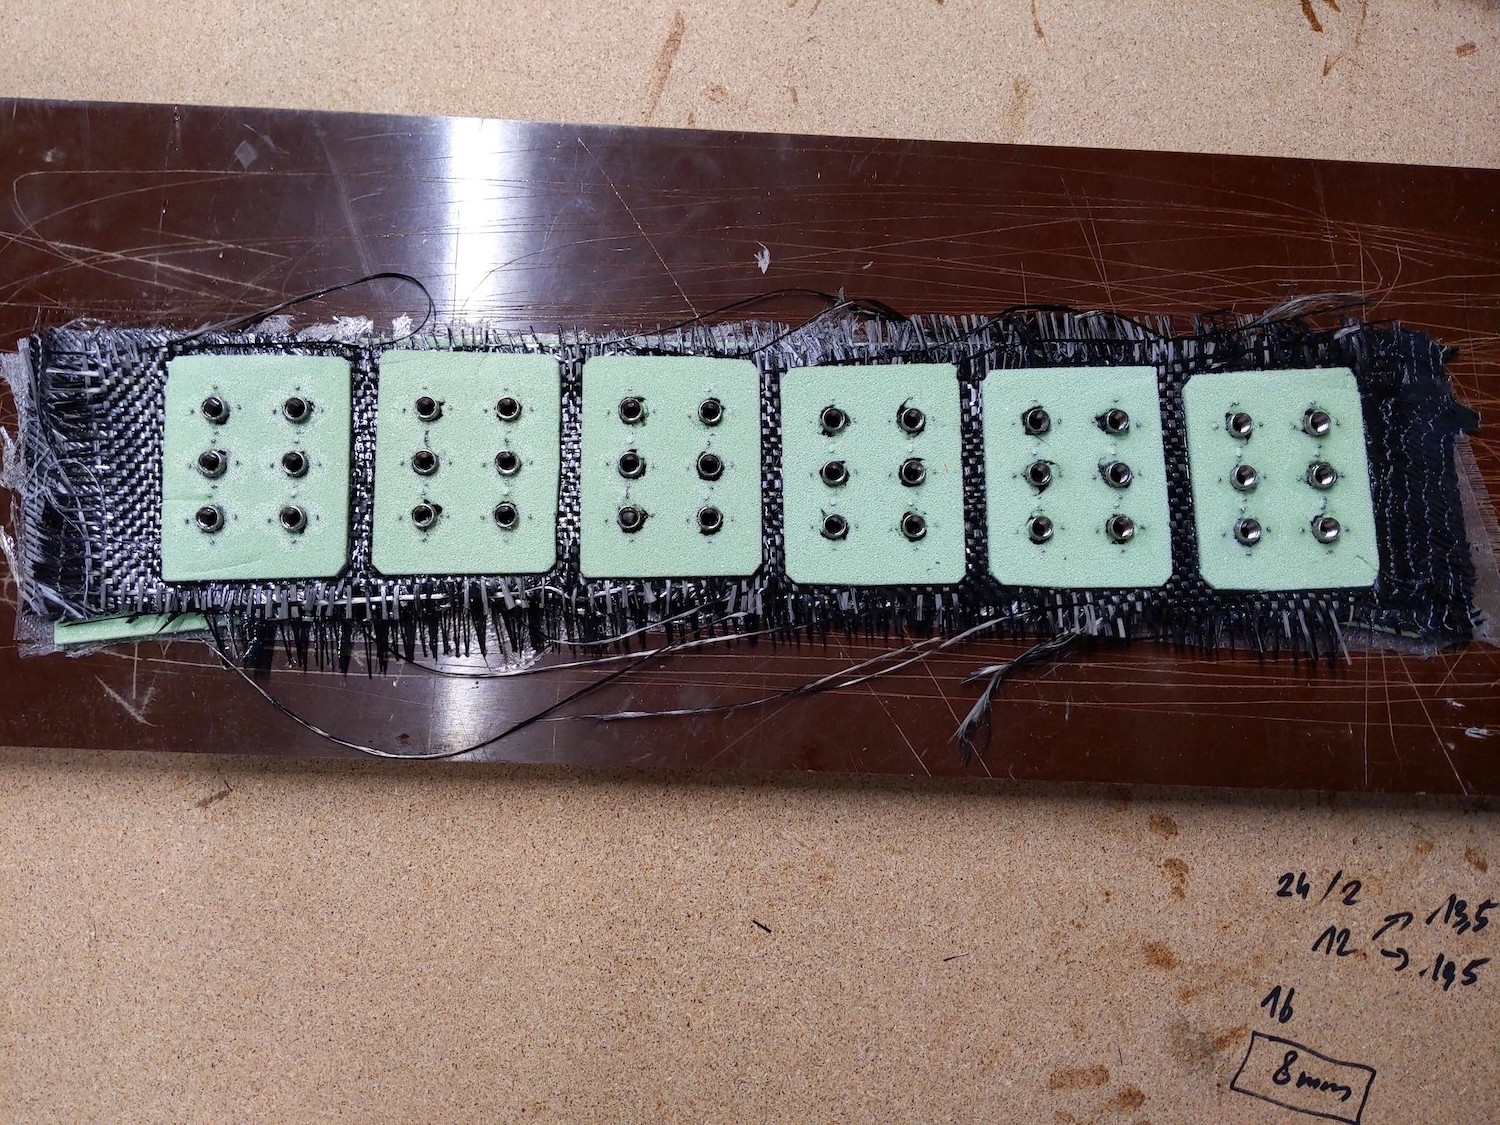
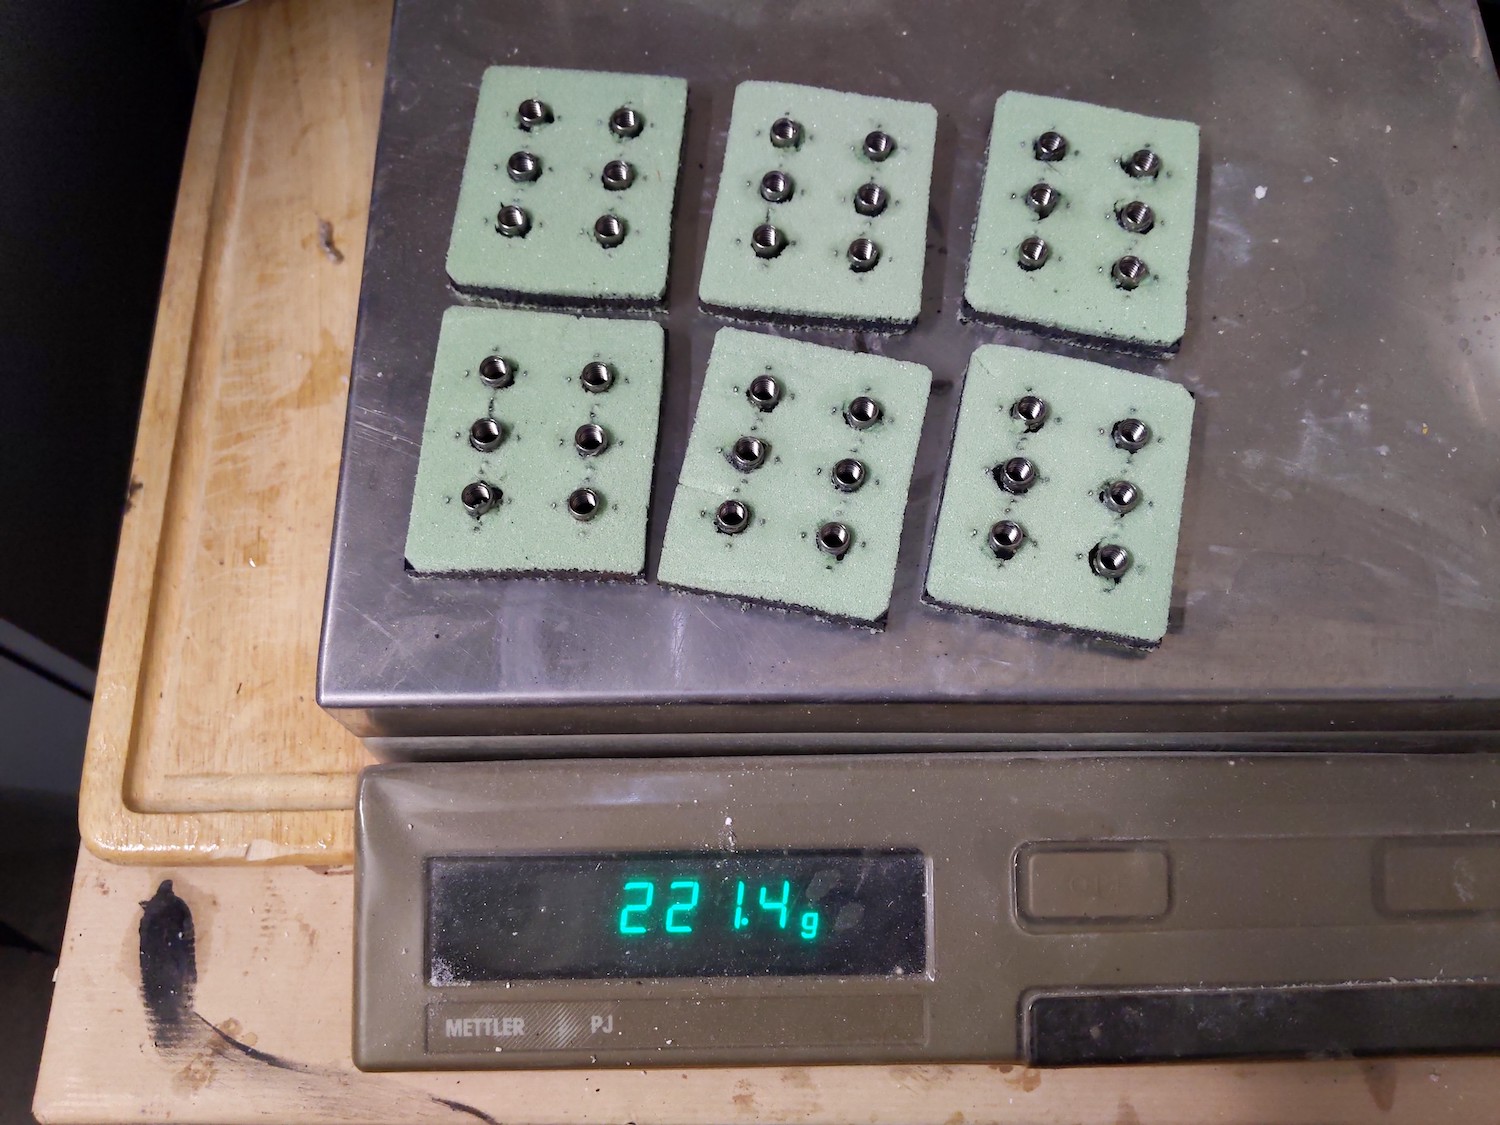
Ultimately the inserts are cut out with a steel saw
The total weight of all 6 inserts is 221.4g, that means 95.4g of the total weight can be attributed to carbon and epoxy.
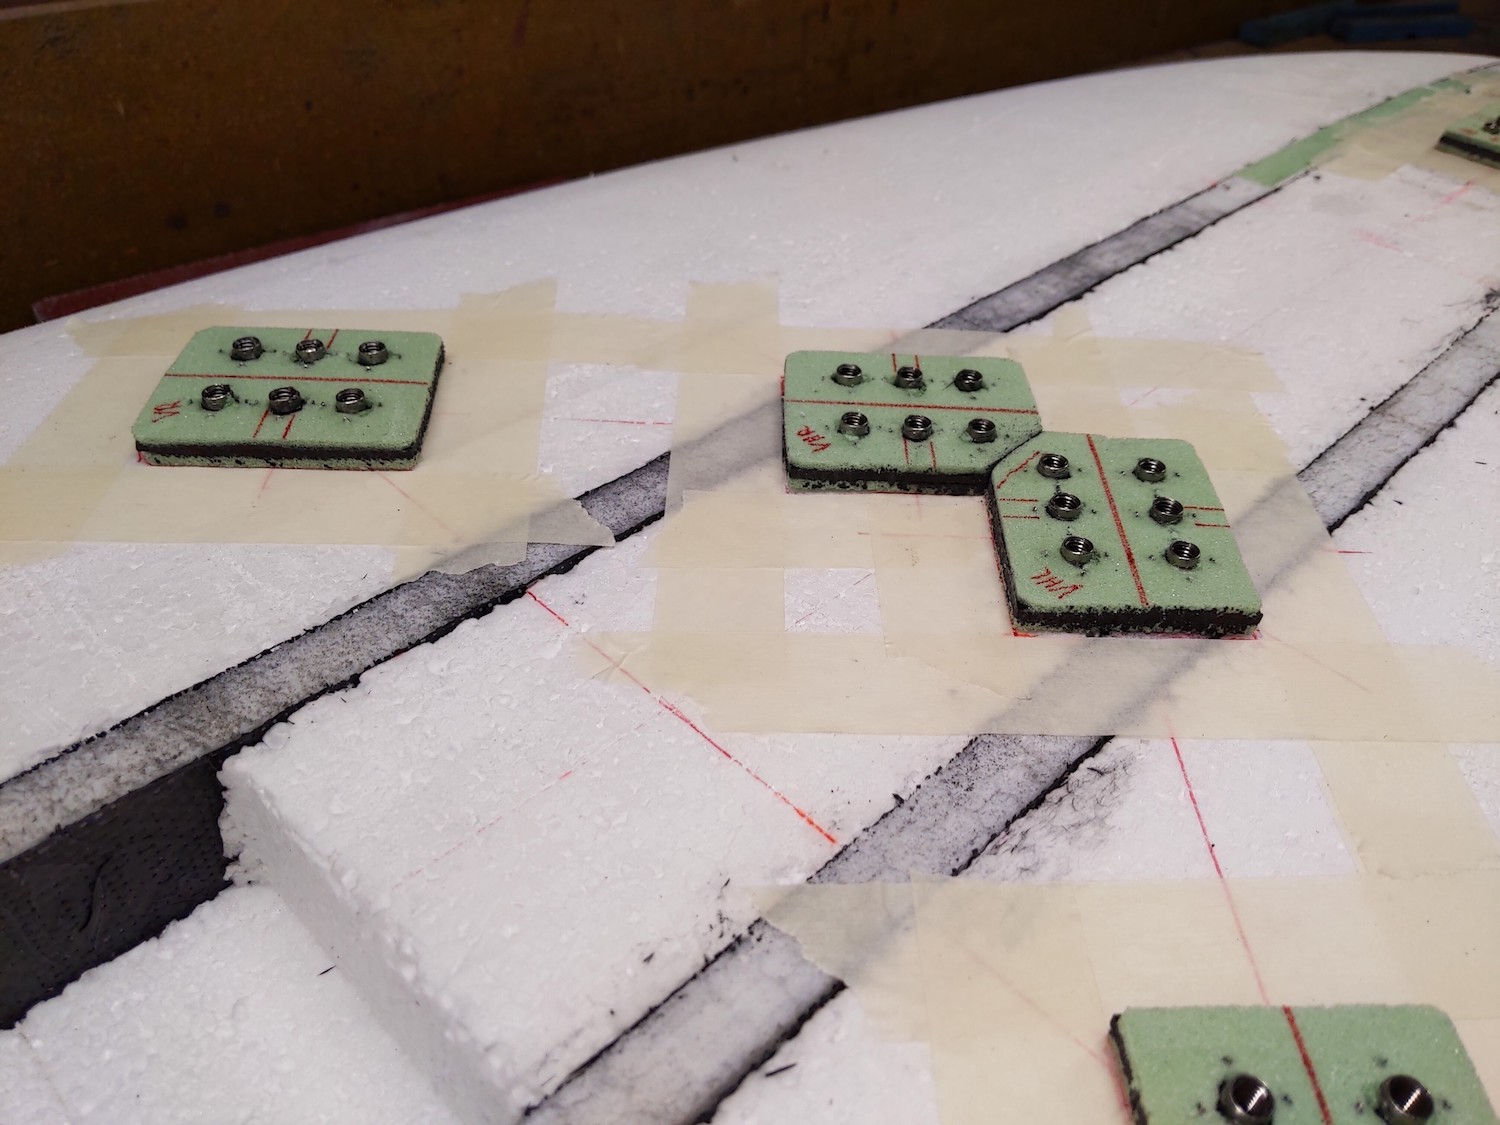
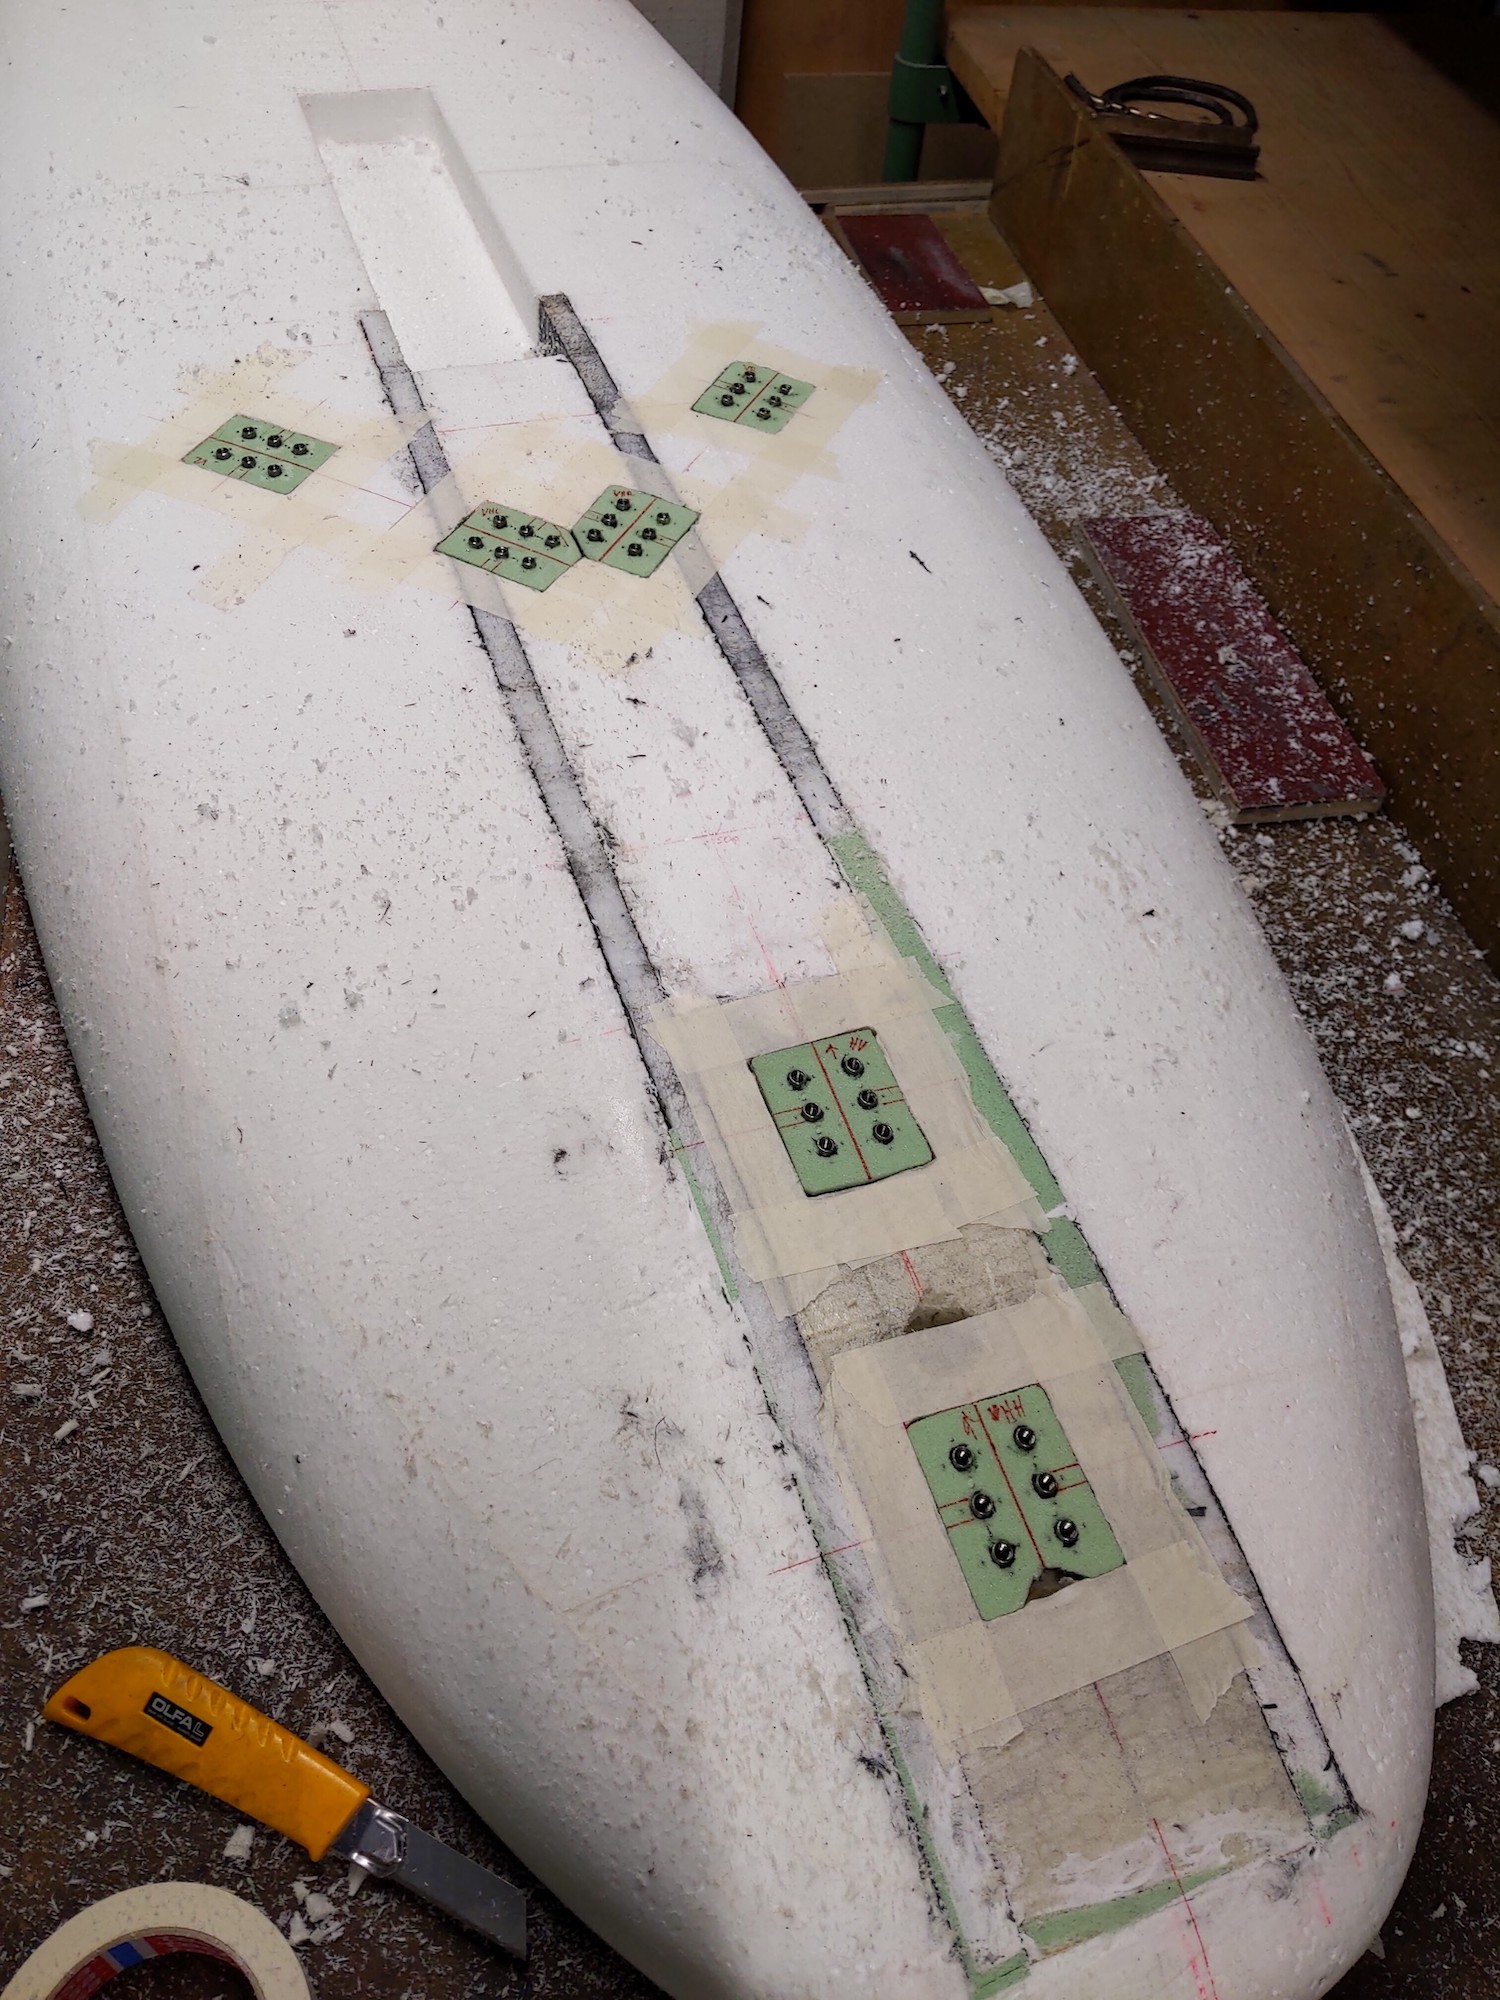
Adding them to the board is a two step process. In a first step the respective holes are milled out of the board. In the second step a thin layer of glass is put in that hole followed by the insert and followed by another thin layer of glass (not shown in the pics). This strengthens the construction and also adds another layer of safety - a cavity for a potential water leak (in case somebody uses a way too long screw and penetrates through both carbon and Airex - which is hopefully unlikely).
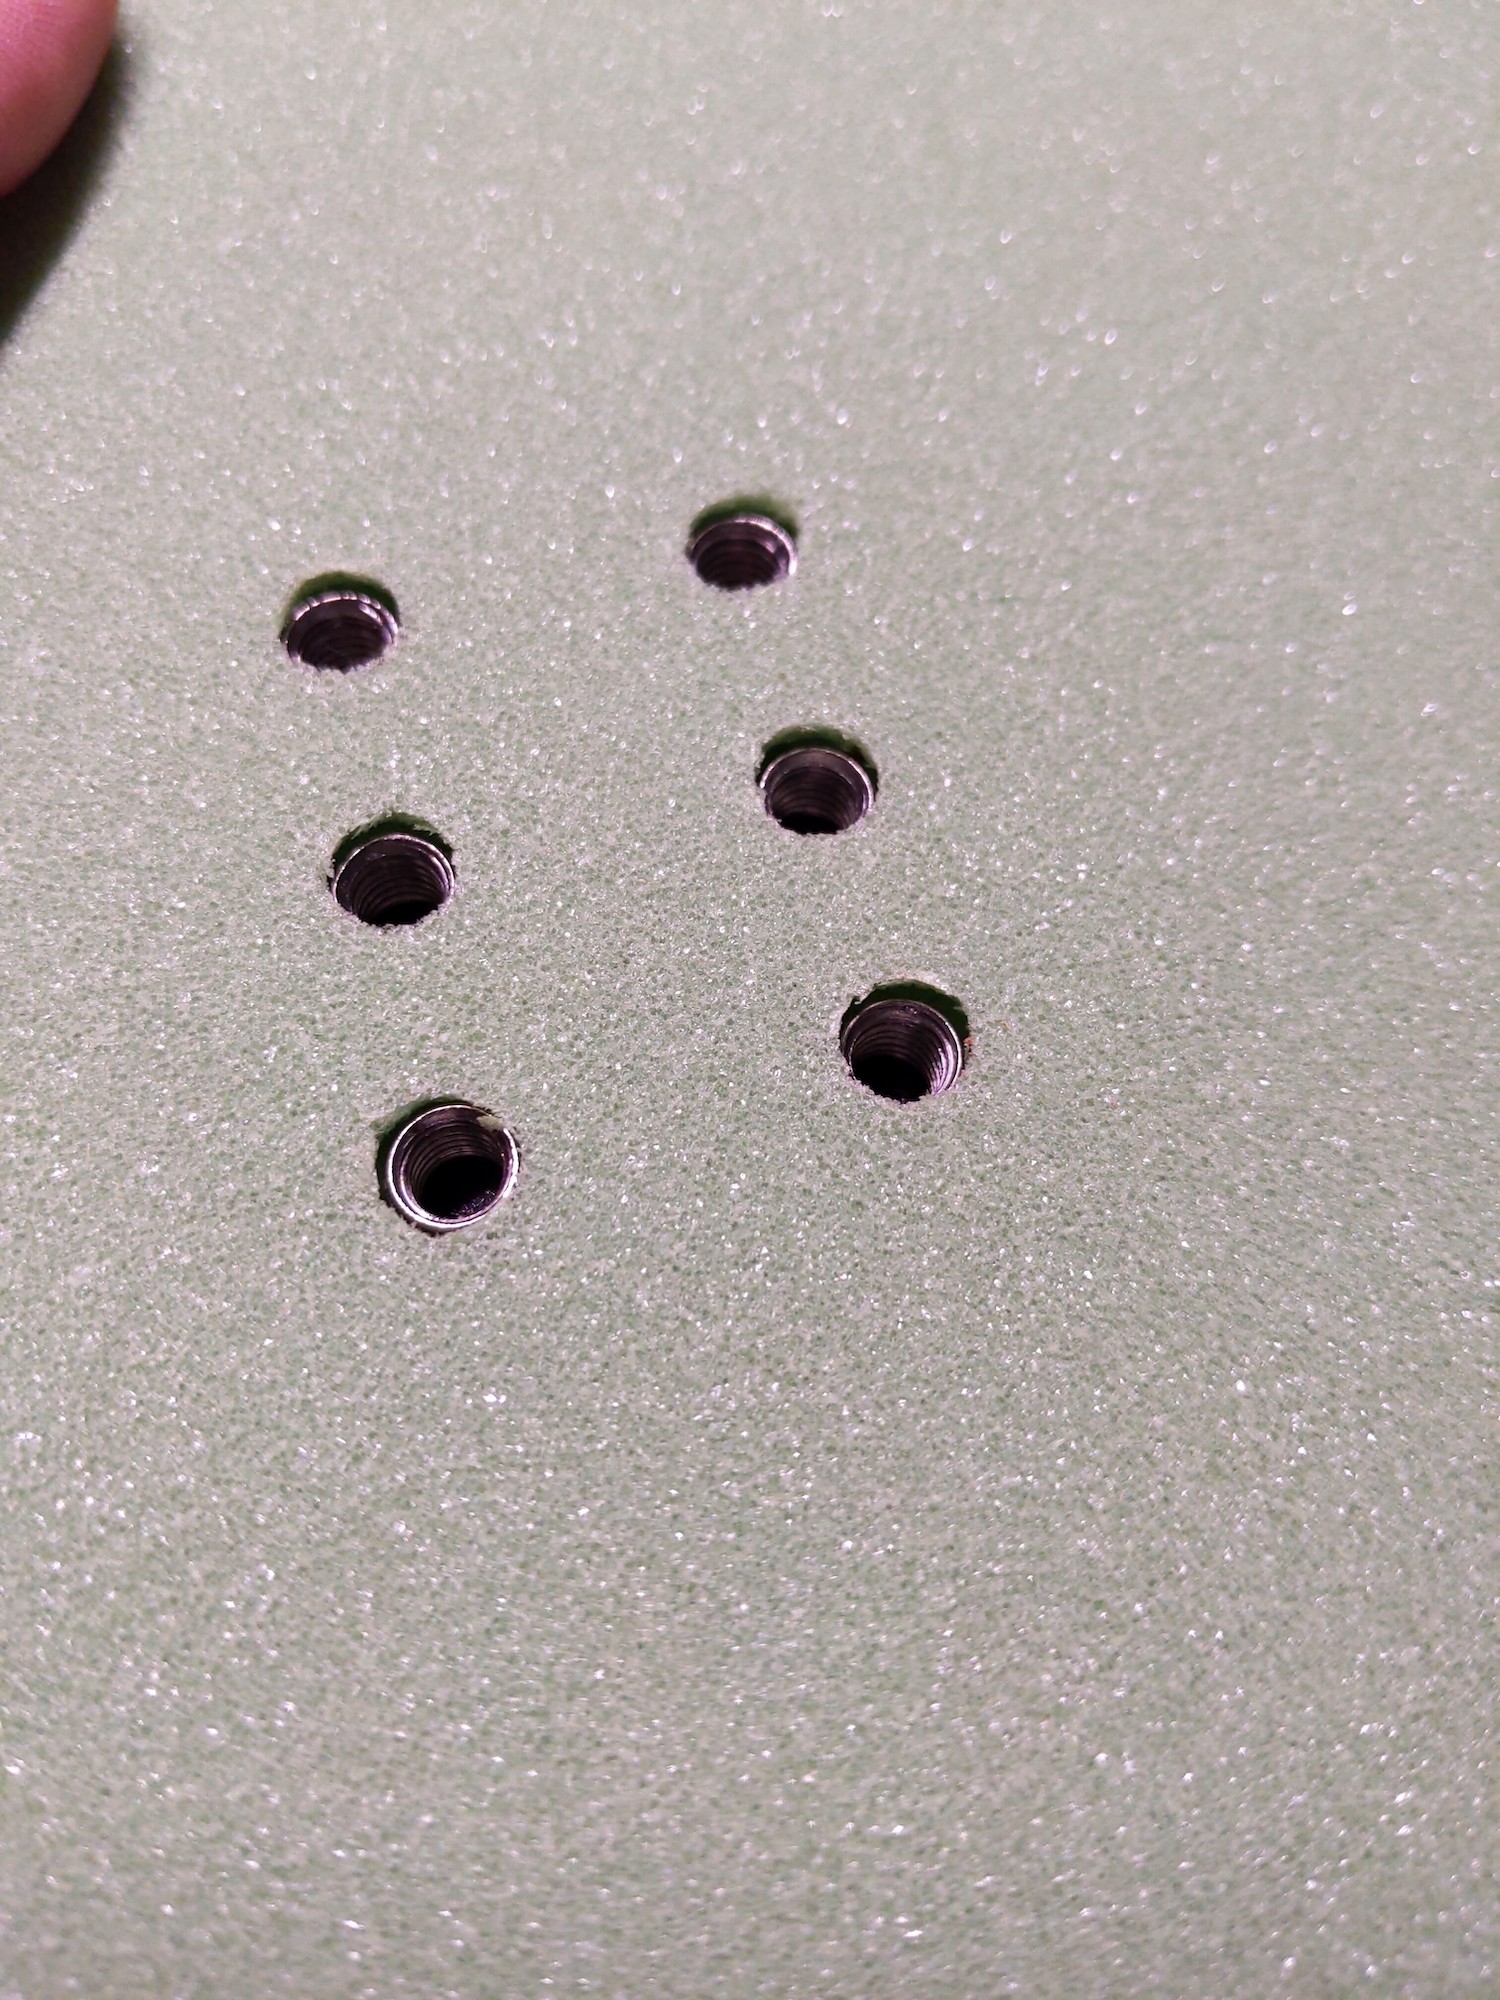
After the final layer of Airex is glued onto the board under vacuum the stainless steel cylinders are flush with the surface (pic below just for illustration - no epoxy that would fill the void between nut and Airex added yet).
Happy building!