The latest Armstrong A+System promises a better rigidity between mast-fuselage and fuselage-front wing. For large wings upgrading my old fuselage to the new A+System did indeed improve the firmness of these connections.
If you already have a A+System fuselage but an old mast or front wing you need the Armstrong upgrade kit to drill two additional holes into the mast and one into the front wing. Arnie put an instructional video on youtube that shows how it's done.
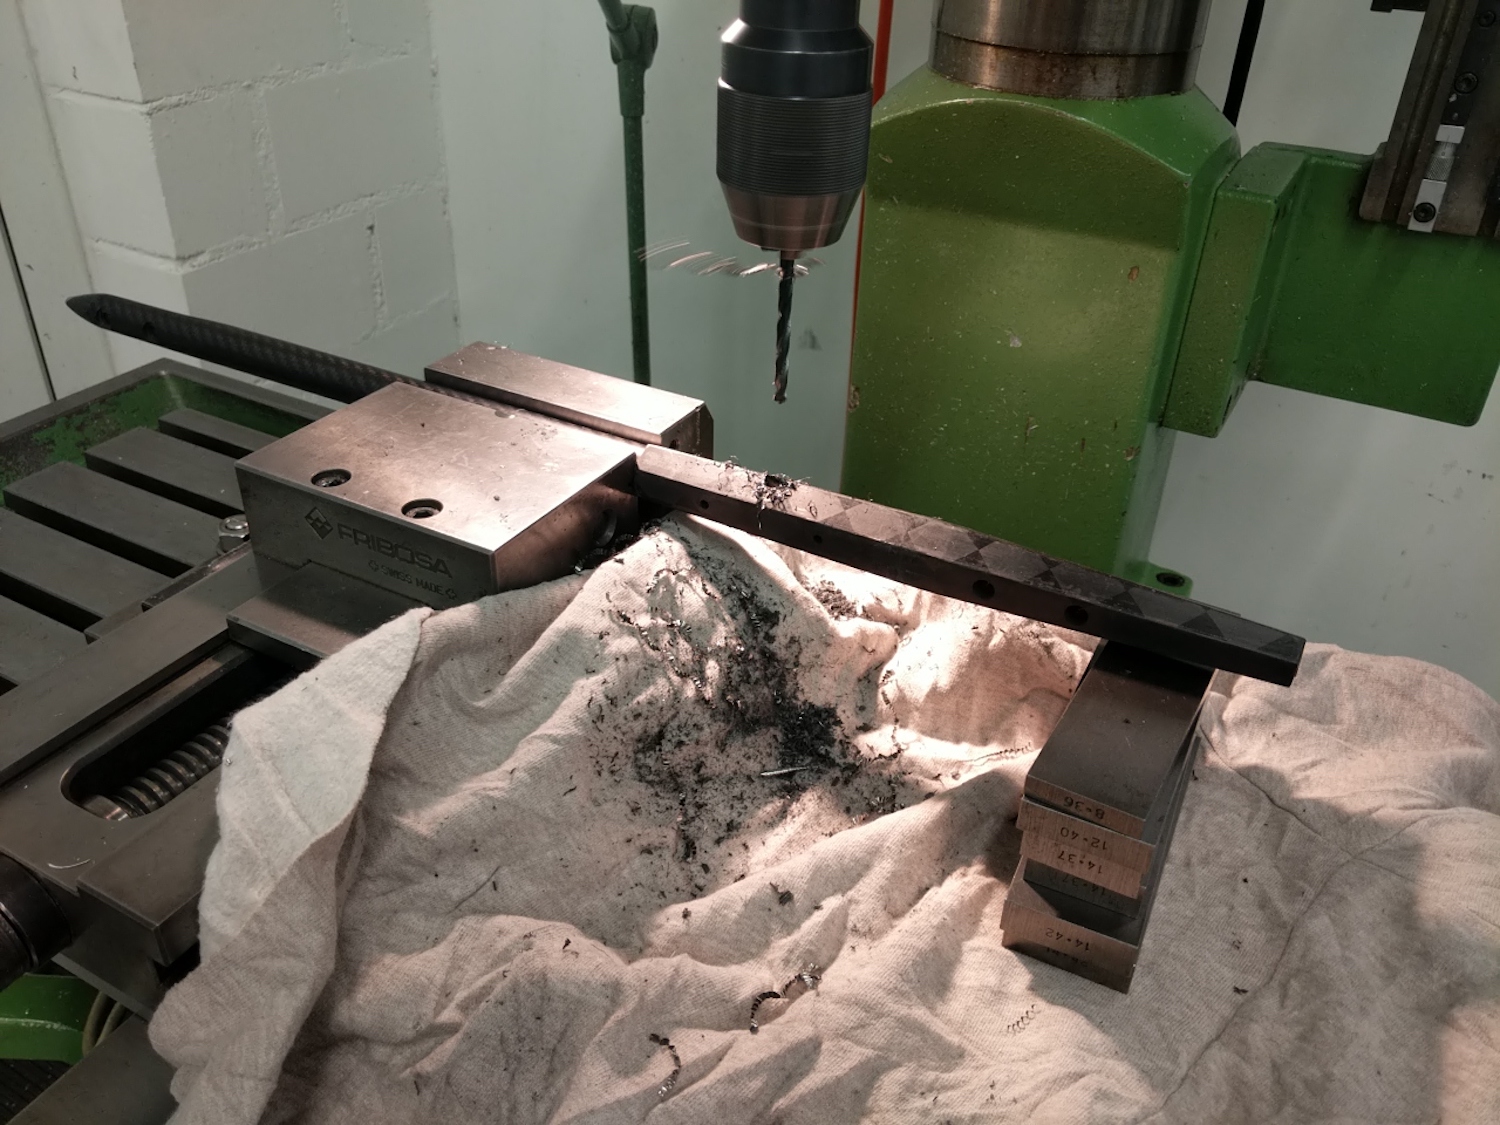
Old fuselages can also be upgraded to the new A+System but this requires some work. In opposition to popular opinion, the titanium core of the fuselage can indeed be machined with standard HSS tools available in any do-it-youself store.
Here is what's required
- 9 mm HSS end mill (2/3 or 4 flutes) with center cut
- center drill bit
- 5.1 mm HSS drill bit
- new set of M6 thread taps (No 1, No 2 and final) and thread cutting oil (latter is essential!)
- good fixture on a drill press or a vertical milling machine
- either a vacuum or enough drill liquid to avoid inhaling drill dust
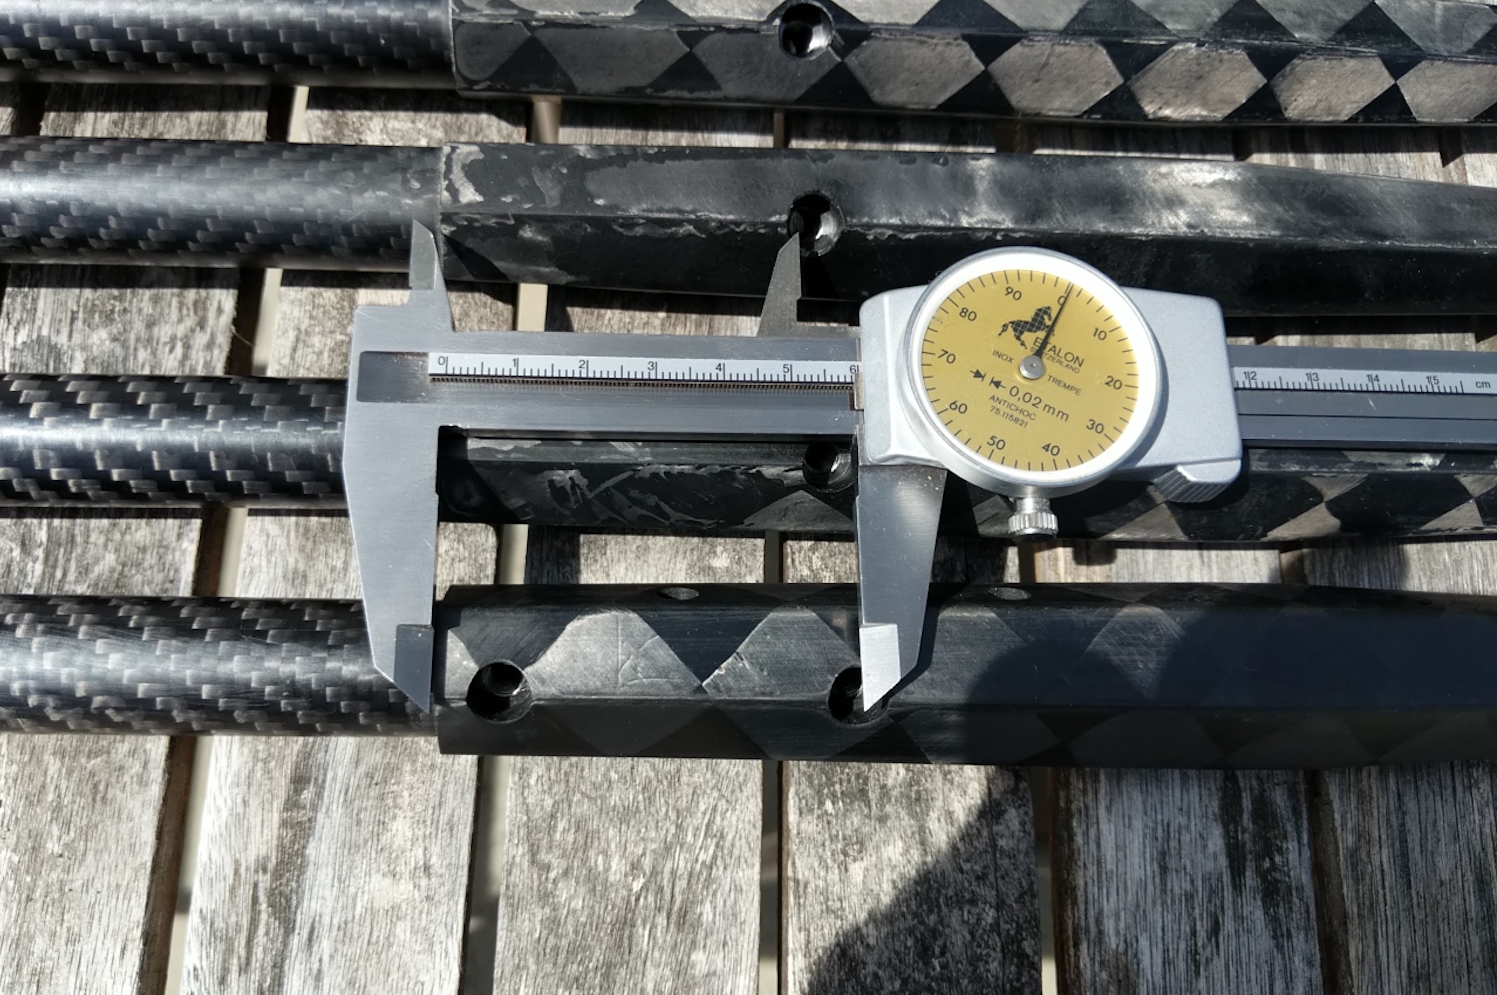
The distance between the edge of the hexagonal part to the center of the additionally needed hole is exactly 59 mm. The caliper in the image below is just for illustration. Needless to say the hole is also centered around the ridge. Another option besides measuring the position of the hole and possibly drilling it imprecisely is to use the above mentioned upgrade kit to drill a pilot hole. This might just be the most precise option if you only have a drill press at home.
After you have found the position of the hole and double-checking that it is correct it is time to counter-bore the future hole on the port (!) side of the fuselage and flatten down the round surface of the fuselage's titanium core a bit. This is absolutely necessary otherwise our future through hole most likely won't pass through the core centered. The reason for the counter bore only being on the port side is that the future 'counter nut' will sit in there. In case you got it wrong despite the red text I'd suggest to add a counter bore on the other side of the fuselage too, this won't be the end of the world but you just might have weakened your fuselage more than necessary.
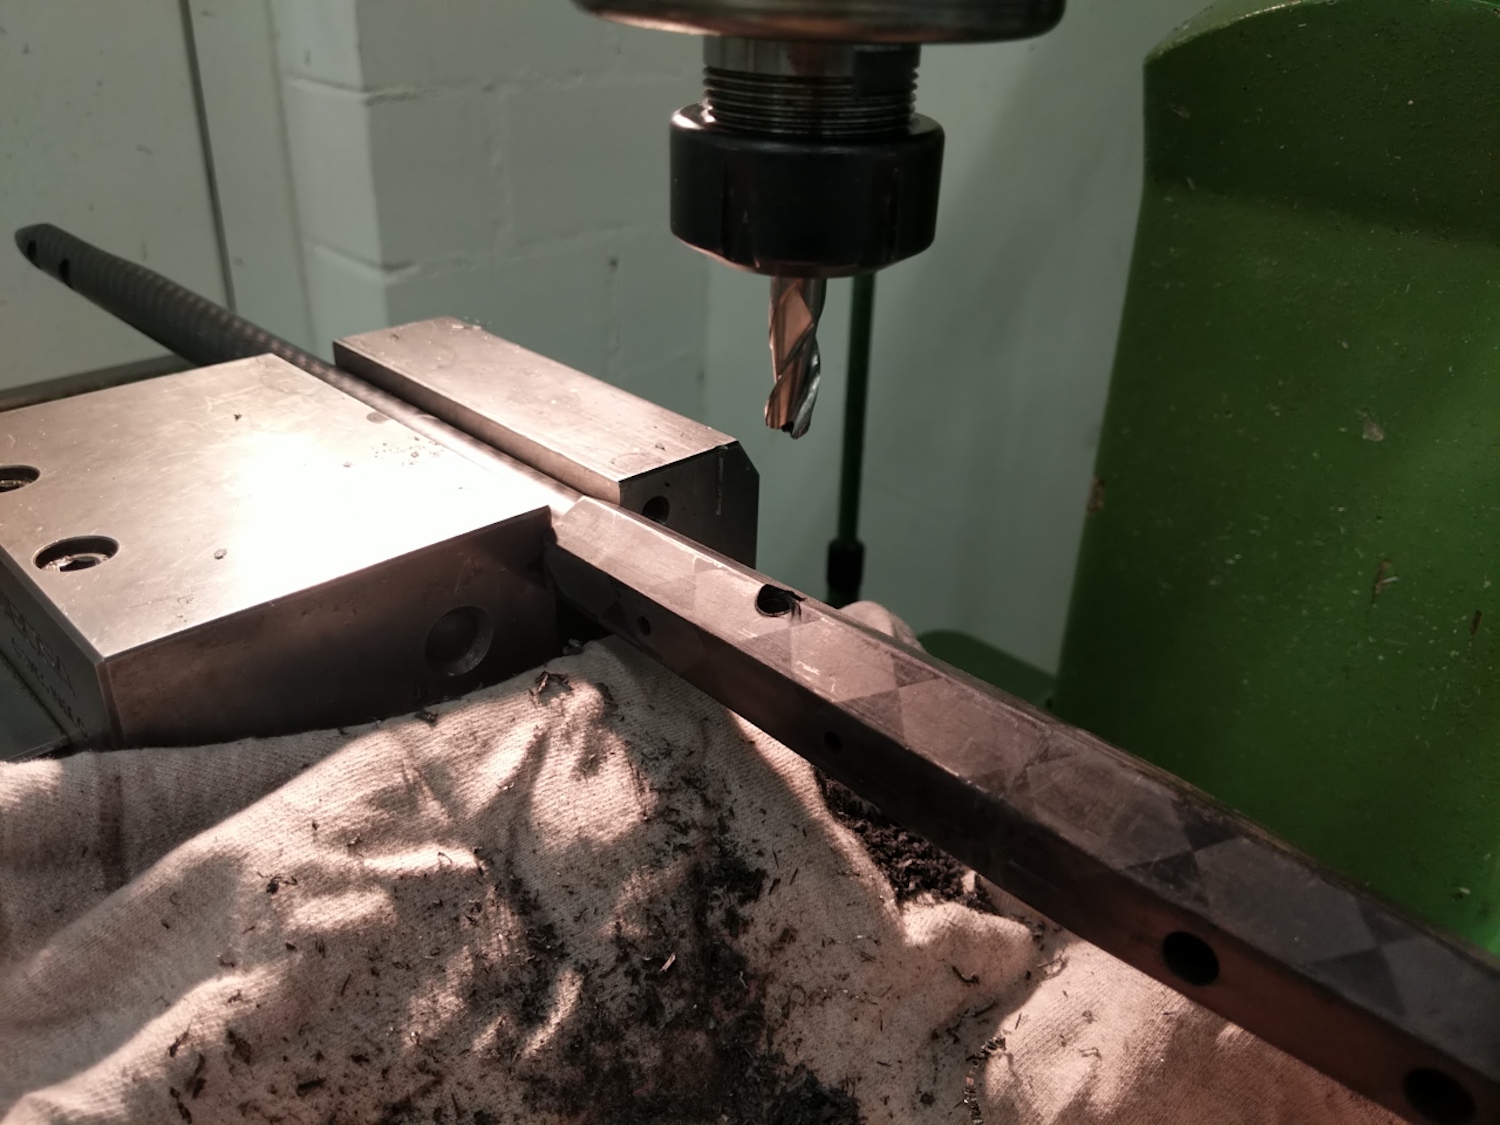
The next step is to add a guidance hole for the 5.1 mm drill bit with the center drill bit on the small plateau formed in the previous counter-bore operation with the end mill.
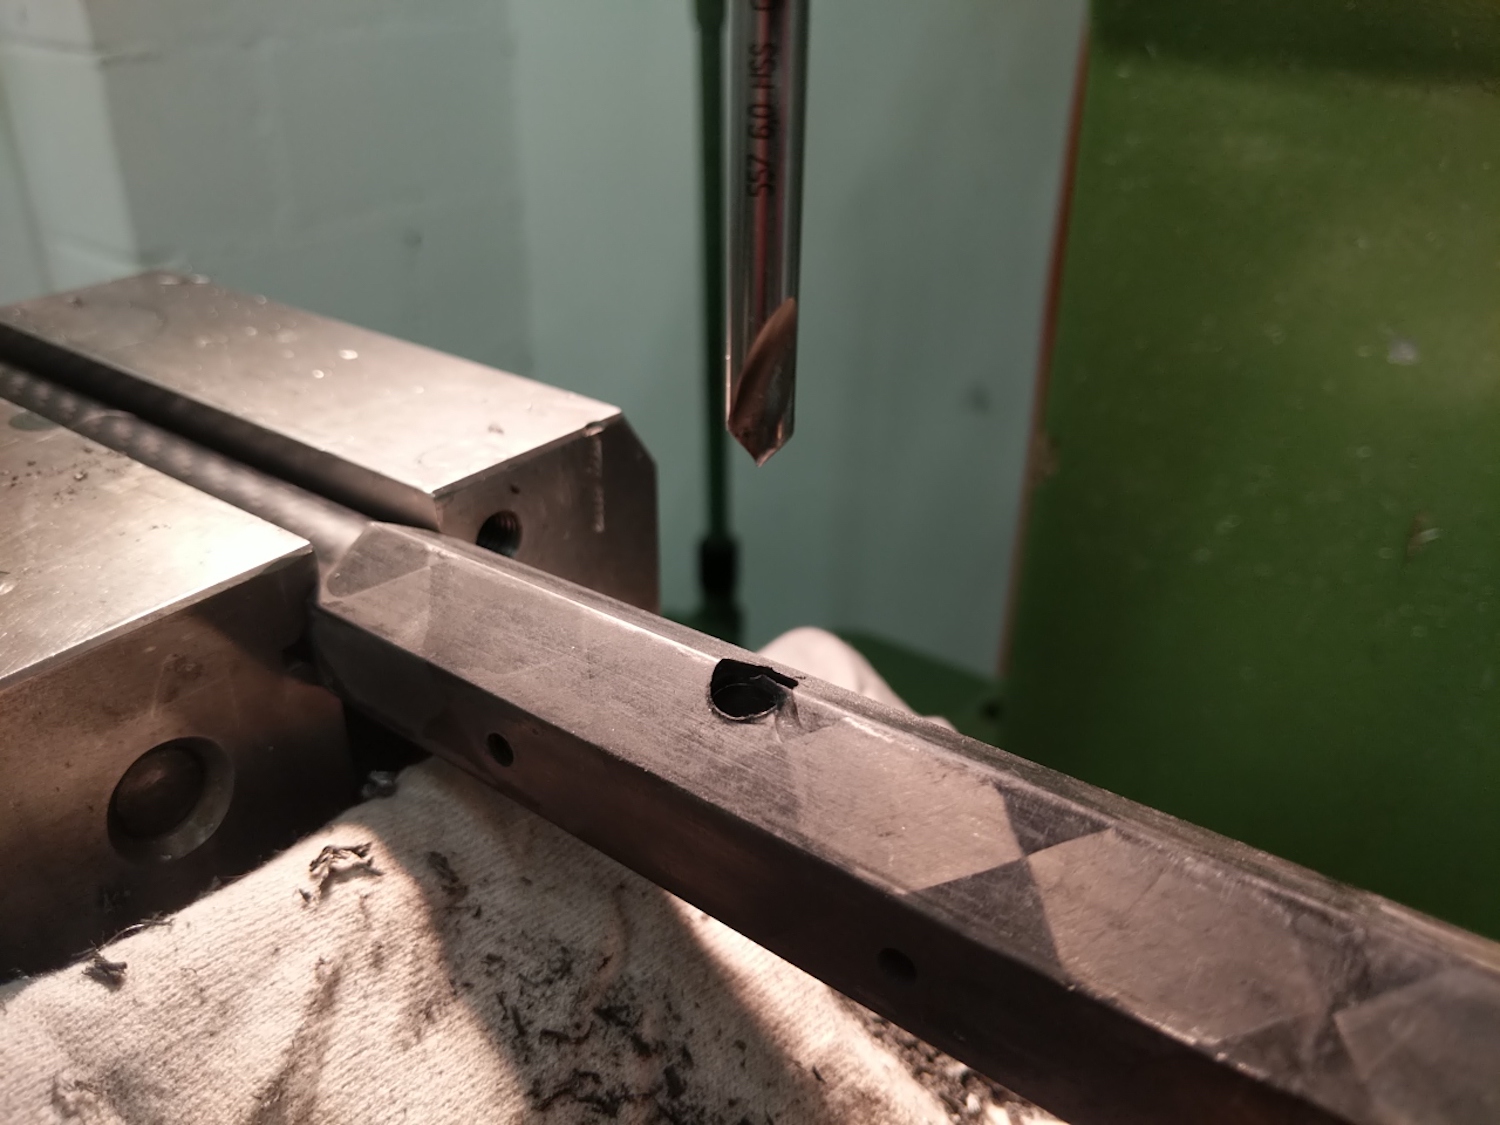
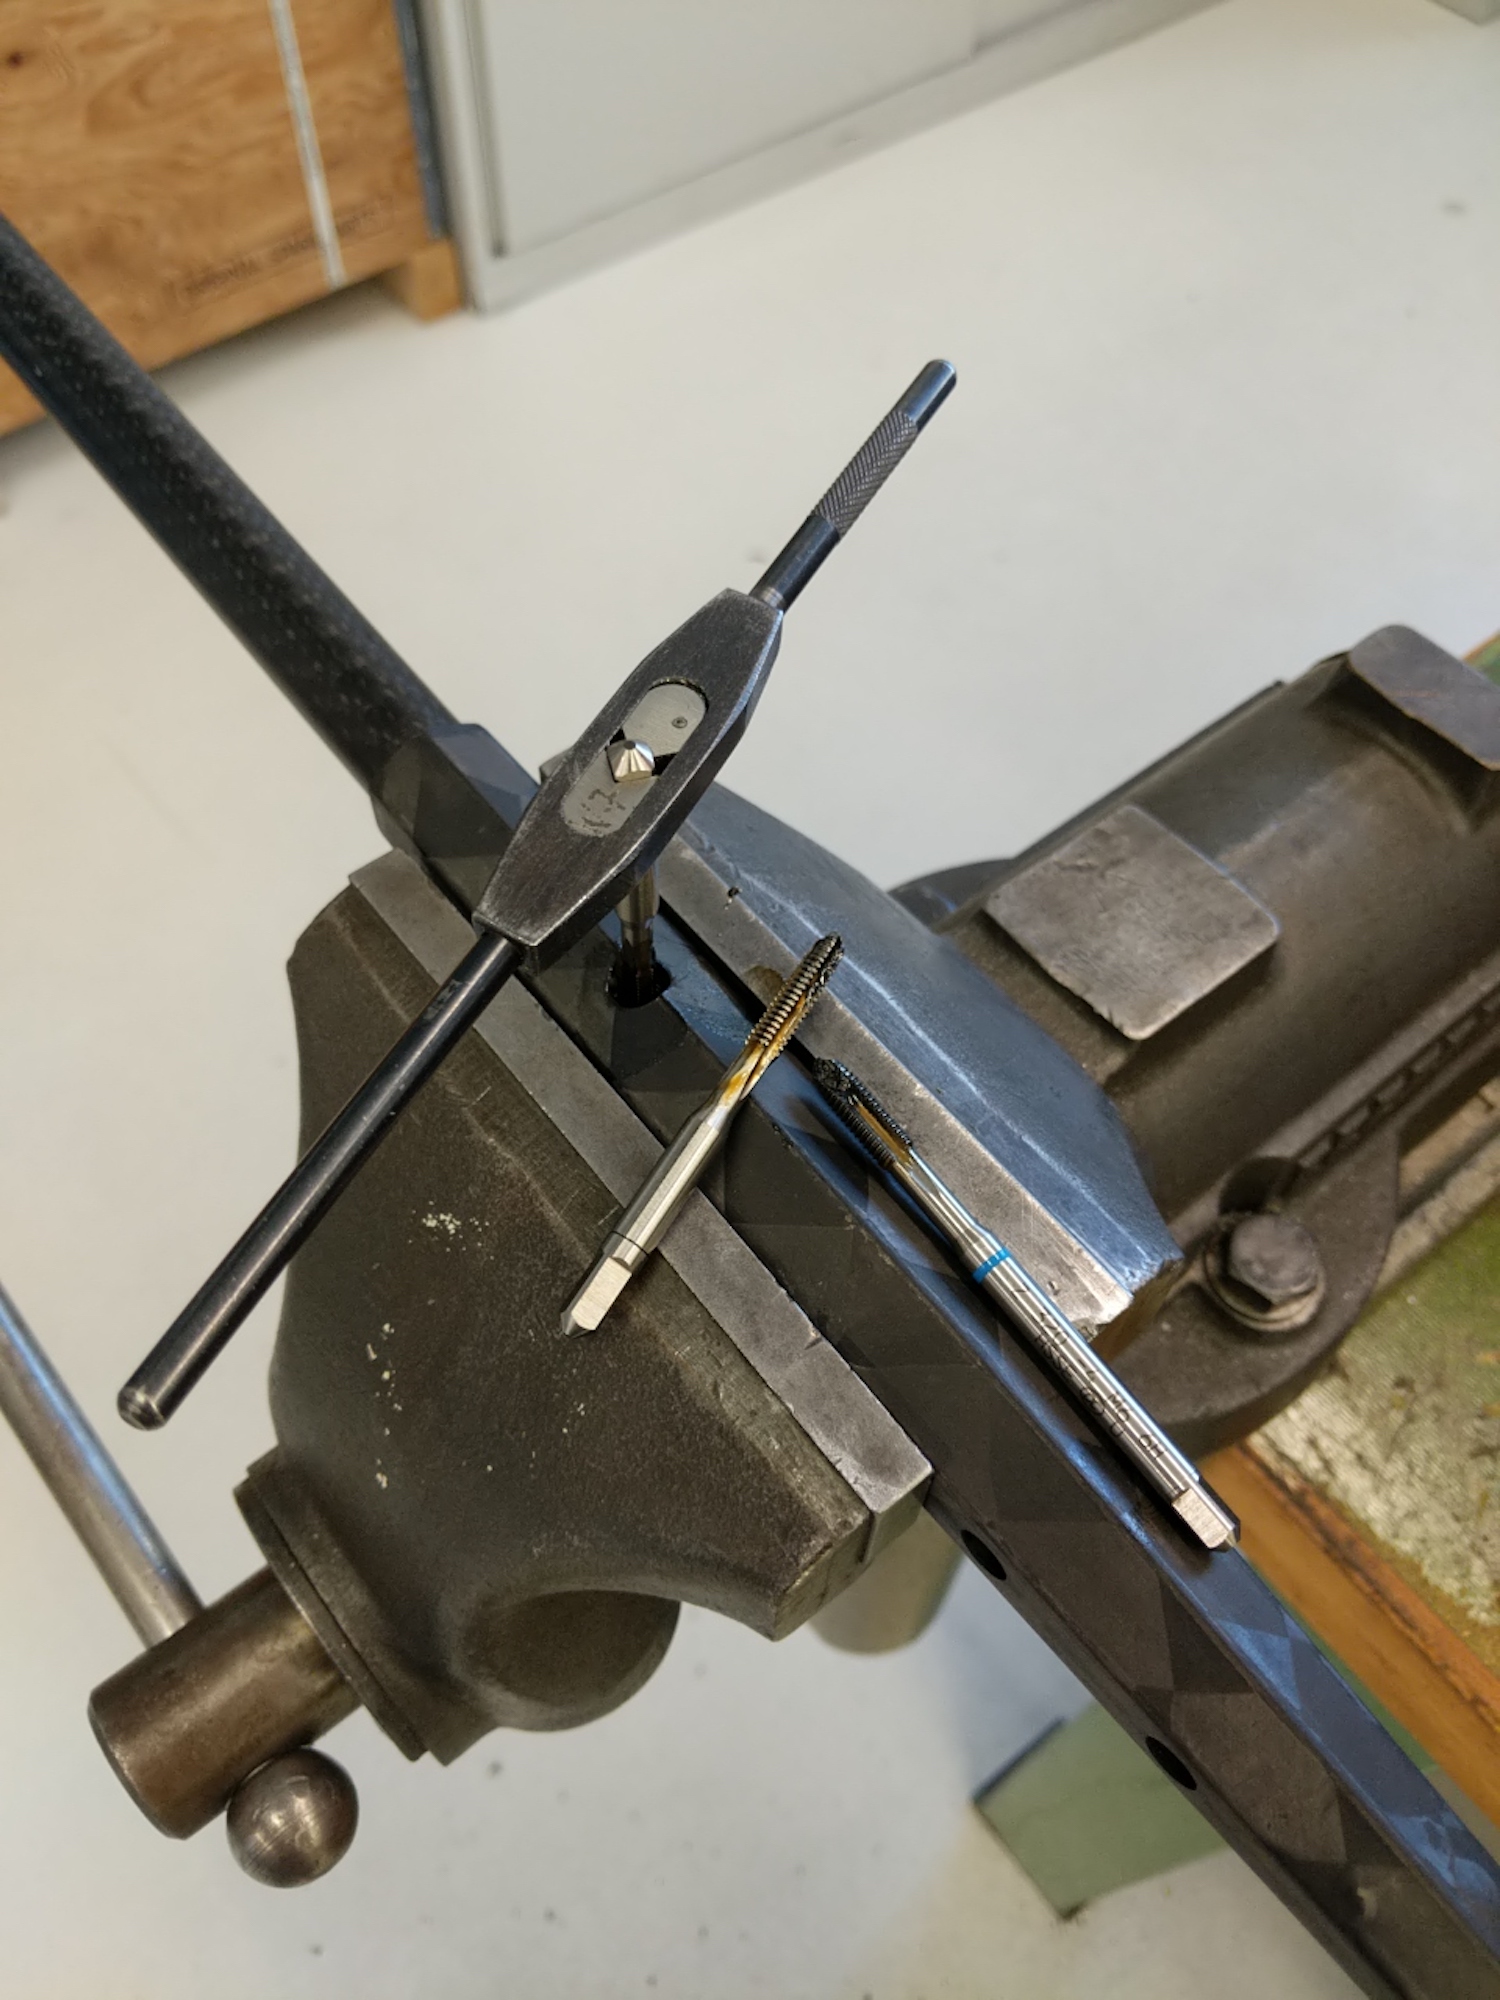
After which it should look like this:
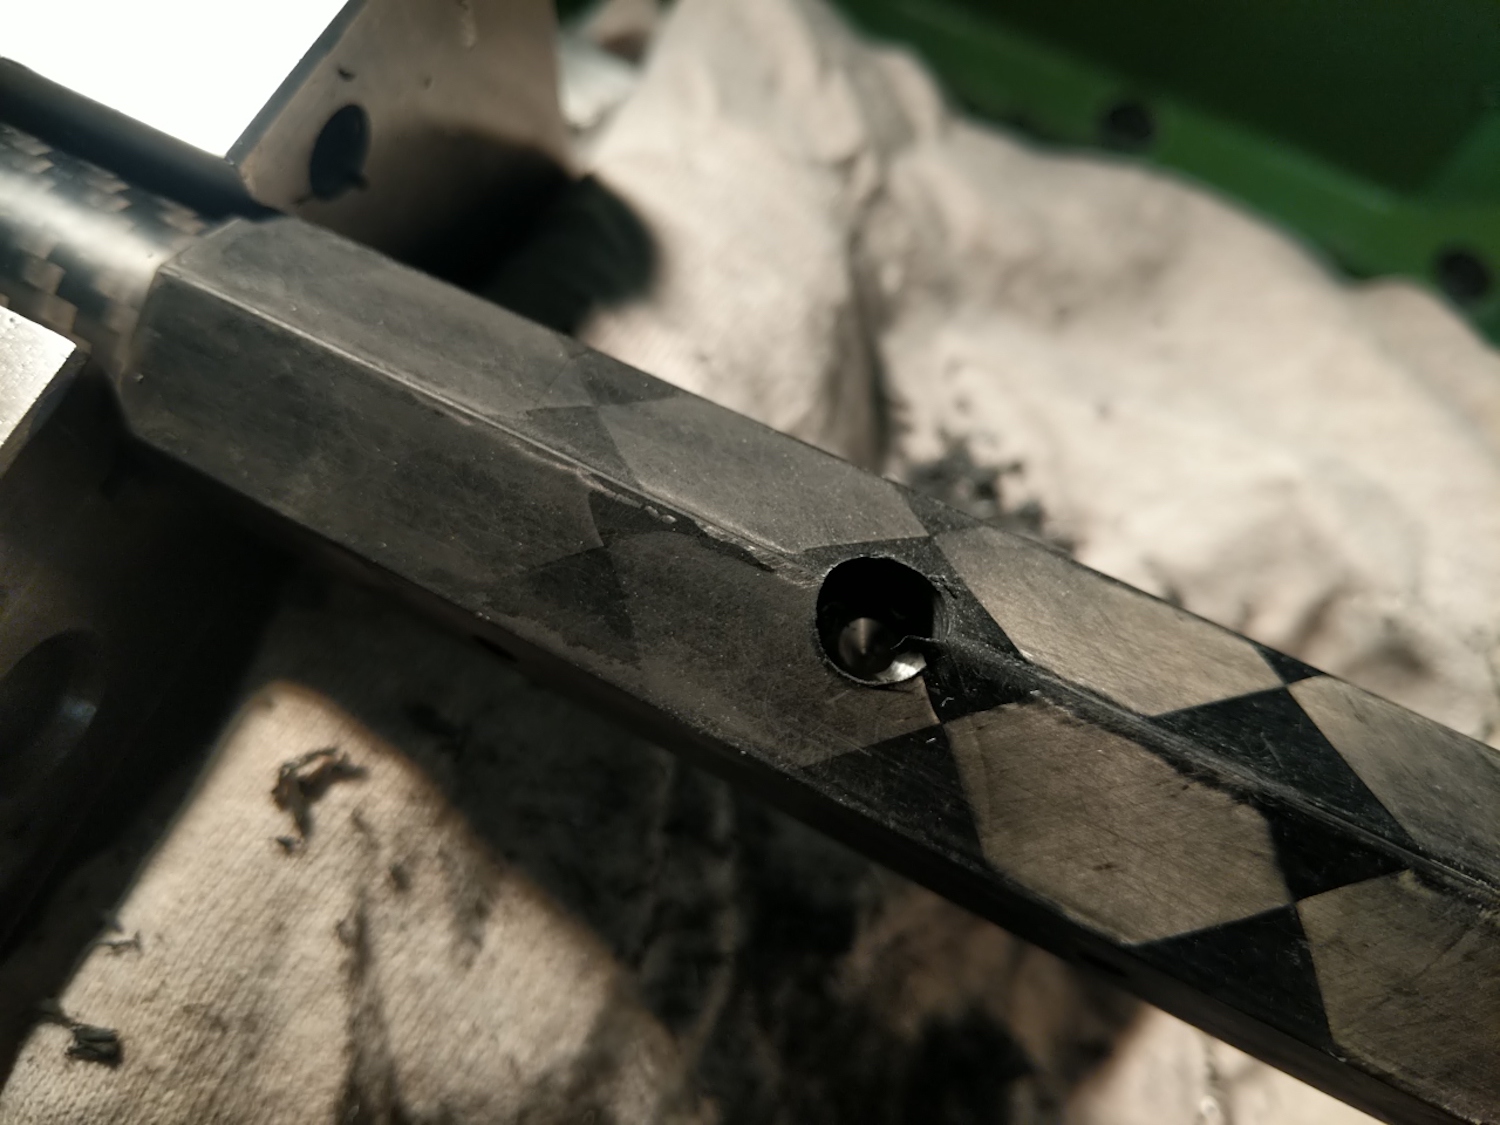
Now it's time for drilling the through hole with your 5.1 mm drill. Be patient and apply more pressure than you would expect (similar to stainless steel). Once you passed the titanium core with your drill reduce the pressure until breakthrough otherwise you'll rip out some carbon fibers from the surface (not catastrophic but it looks bad).
Thread cutting is the most painful part of the endeavor. Start with thread tap No 1 and work yourself up to the final one with a good amount of lubrication. If you haven't cut a thread watch some tutorials on youtube like this one.
Clean off the thread cutting oil and remove sharp edges with a knife or sand paper and that's it!
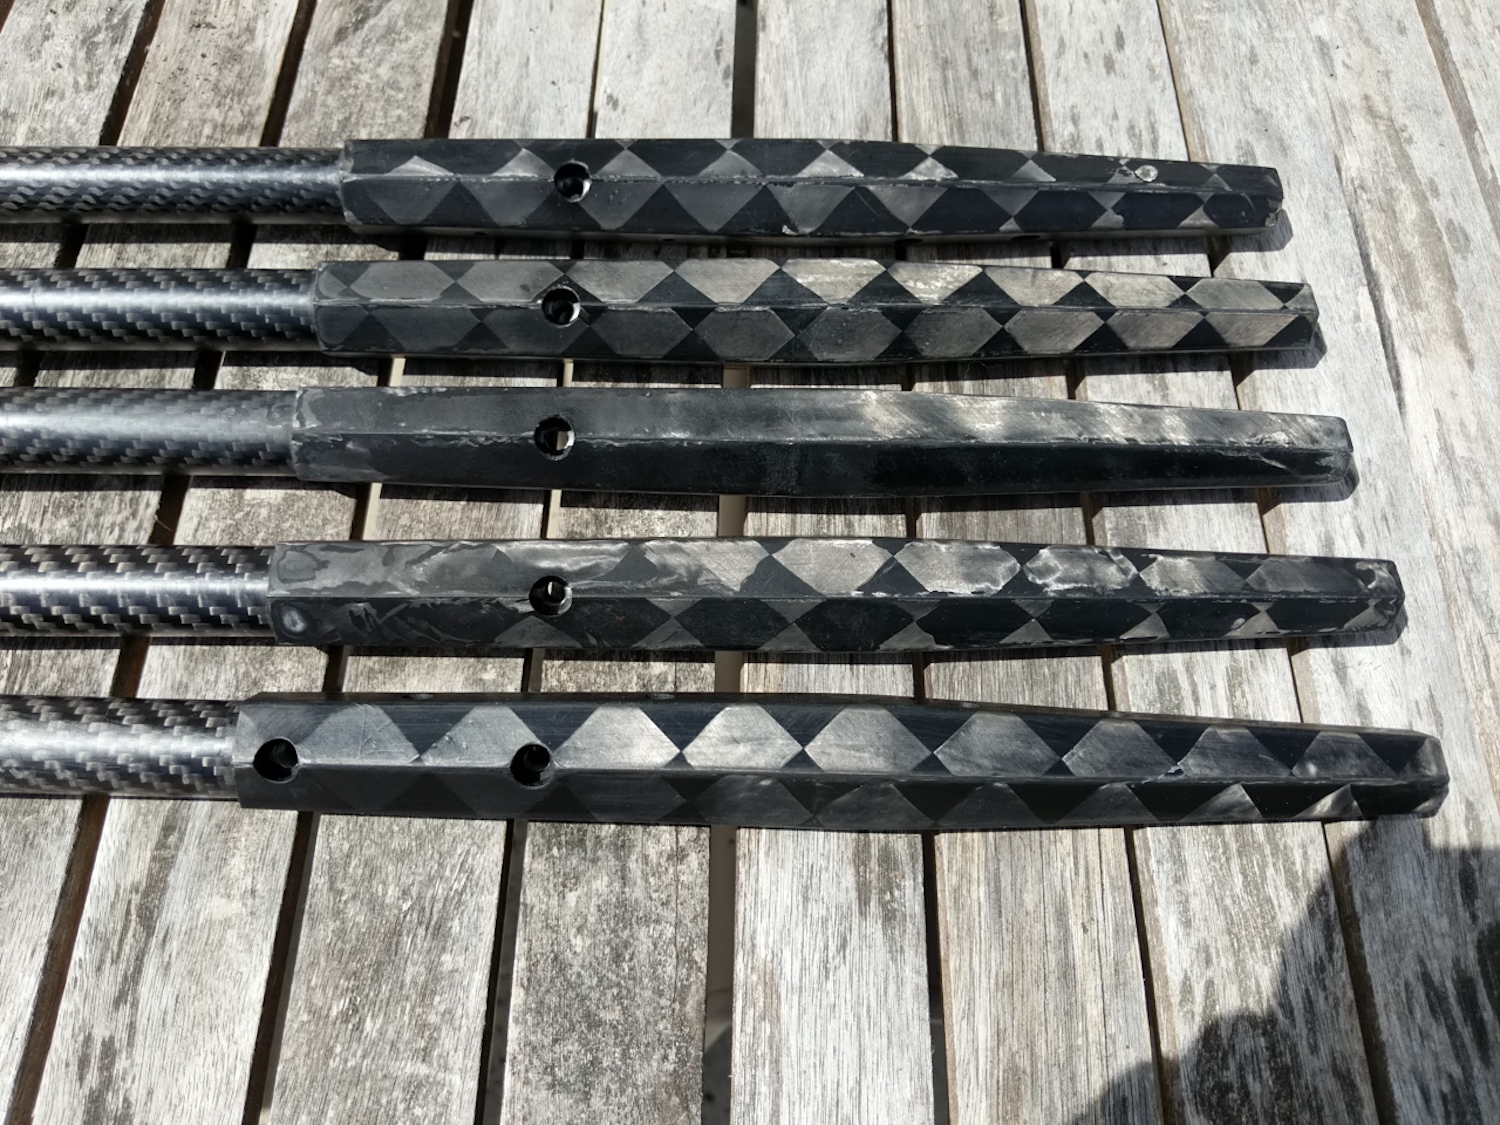
Original Armstrong A+System fuselage in the front and 4 upgraded 'old' fuselages in the back. There is an additional hole in the new fuselage but it is not (yet?) needed. Maybe this will become the A++System at some point ¯_(ツ)_/¯
Take your time and it will work out just fine!